
 Save
Save
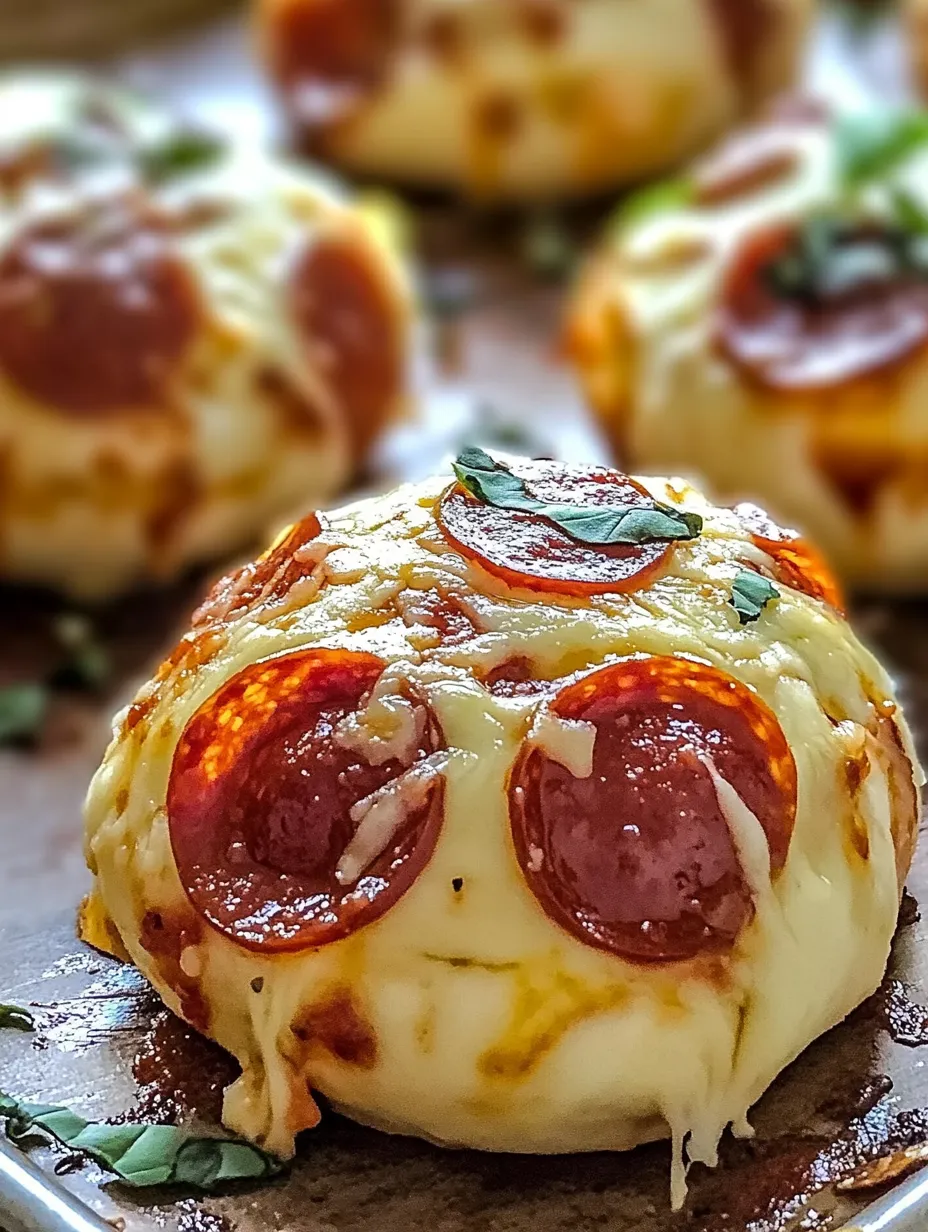
I found this snack idea by chance last autumn when I needed a quick treat for my boy's soccer team. These puffy pizza pockets have now become our weekly Friday tradition. There's something wonderful about cracking open that crispy crust to discover the stretchy cheese and spicy pepperoni tucked inside. They're dangerously simple to make, which means I'm always tempted to throw them together whenever pizza hunger strikes.
Whipped these up when my niece and nephew slept over recently. My nephew, who usually takes apart everything on his plate, gobbled up three without stopping. My sister-in-law sent me a message next day telling me the kids were asking when they could return for "those round pizza things."
Basic Ingredients
- Pizza dough: The stuff from those refrigerated tubes does the job perfectly. I've tried making dough from scratch, but let's face it, the easy option wins.
- Marinara sauce: Pick your top store brand or use leftover homemade sauce. Thicker sauce works better as it won't leak.
- Mozzarella cheese: Grate it yourself for better melting compared to those pre-packaged bags. It's worth that tiny bit more work.
- Pepperoni: I cut mine into small bits so you get some in every bite. Those tiny pepperoni pieces are great too if your store carries them.
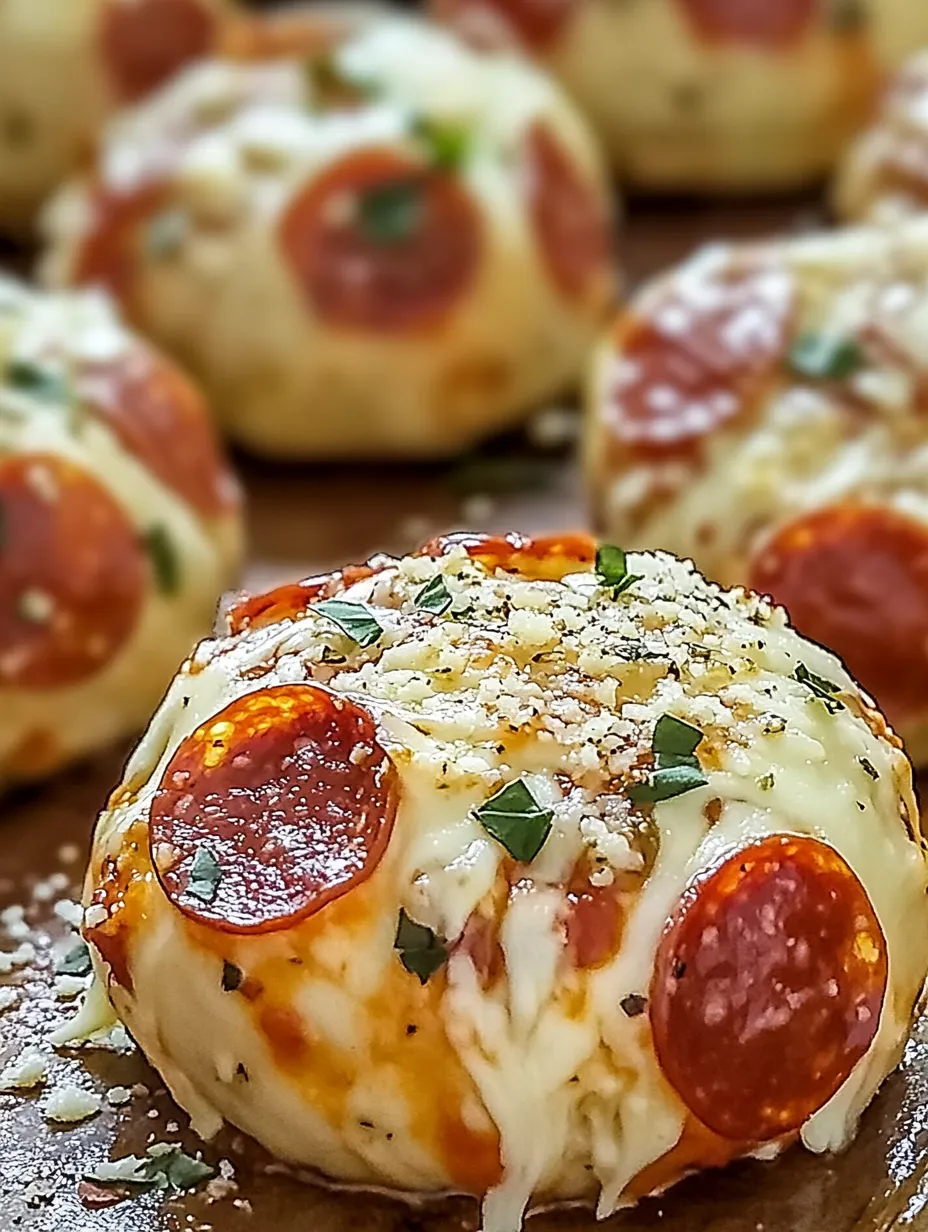
- Olive oil: Just a brushing helps get that brown, crispy crust - don't miss this step.
- Seasonings: Garlic powder and Parmesan on top change these from okay to amazing. Add red pepper flakes if you want some heat.
 Save
Save
Tasty Pizza Pocket Tricks
- Dough Prep:
- Use dough that's sat out a bit for easier handling. Use plenty of flour on your counter to stop sticking. I roll mine a bit thinner than it comes from the can - about 1/4 inch seems to work best.
- Cutting Strategy:
- A pizza wheel makes quick, even squares. They don't need to look perfect - slightly uneven looks more homemade anyway.
- Filling Balance:
- The trick is not putting too much inside. About a teaspoon of sauce, some pepperoni bits, and a good pinch of cheese per square works great. Too full and they'll burst while cooking.
- Sealing Technique:
- Pull all four corners to the middle, then squeeze all edges tightly closed. I sometimes wet my fingers to help seal the stubborn parts.
- Placement Matters:
- Always put them sealed-side down on your baking tray. This stops them opening up during baking and losing all that yummy cheese.
- Oil Brush:
- Always brush with olive oil - it gives them that lovely golden color and slight crunch outside.
My first try making these turned into a gooey mess. I stuffed them too full and didn't press the edges enough, ending up with what looked like tiny pizza volcanoes. Tasty, but not pretty. Now I've learned that less filling and really squeezing those seams makes them turn out right. I've also found that kitchen scissors cut pepperoni quickly, and a small cookie scoop keeps the sauce amounts even.
Fun Variations
While we love the pepperoni version most, you can try loads of other options. Go for a supreme style with green peppers, olives, and sausage (just cook the sausage first). For veggie lovers, spinach and mushrooms work really well. Buffalo chicken with blue cheese is fantastic if you like spicy food. My kids go crazy for a breakfast type with scrambled eggs, bacon, and cheddar.
Keeping Leftovers
These pizza pockets stay good in the fridge for 2-3 days if kept in a sealed container. To warm them up, stick them in a 350°F oven for about 5 minutes or in the air fryer for 2-3 minutes. They're actually pretty decent cold too - my husband grabs them straight from the fridge for a quick bite. You can freeze them after cooking - just let them thaw in the fridge overnight before warming.
 Save
Save
I've cooked these pizza bombs for tons of parties, quick dinners, and midnight snack attacks. There's something special about seeing people smile when they bite in and find that perfect mix of flavors inside. My neighbor's kid now asks if I'm making pizza surprises whenever he visits. Sometimes the easiest recipes become the most requested, and these little pockets of cheesy goodness have definitely earned their spot in my regular cooking lineup.
Recipe FAQs
- → How far ahead can I prep these?
- You can make them a day in advance and refrigerate them covered. Before baking, brush with oil and add 2-3 more minutes if baking cold.
- → Can these be frozen?
- Definitely! Freeze unbaked bombs, then transfer to a freezer bag. Bake frozen at 375°F for 18-20 minutes till golden.
- → What dough options do I have?
- Crescent rolls, biscuit dough, or homemade pizza dough work great. Puff pastry works well too for a flakier result.
- → Can I try different fillings?
- Totally! Add cooked sausage, bacon, ham, pineapple, veggies, or cheeses. Just keep the filling amount small enough to seal the dough.
- → Why is cheese oozing out while baking?
- Ensure the dough edges are sealed completely, and patch any weak spots. Also, don’t put too much filling.