
 Save
Save
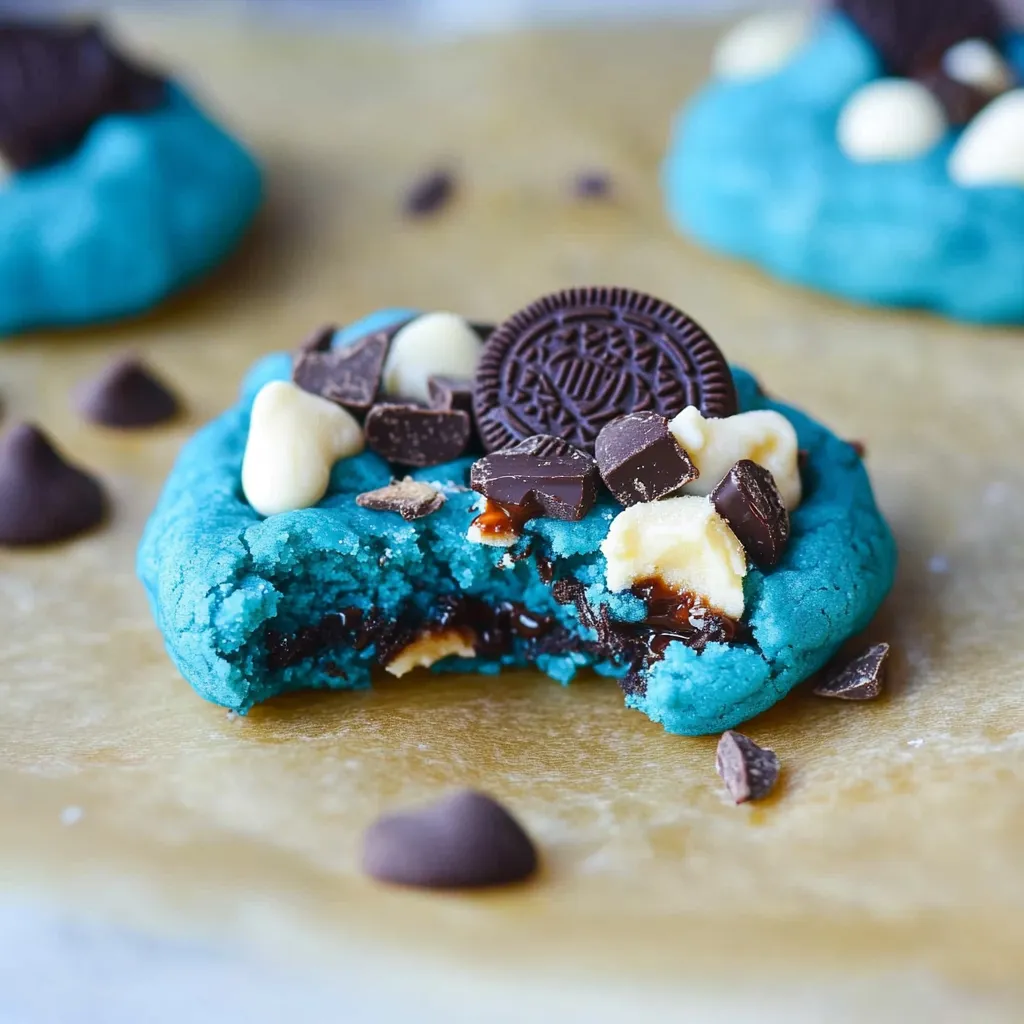
Dive into blue beast fun with these packed cookies that elevate the TikTok hit to something special. These huge treats show off bright blue dough stuffed with chocolate bits, broken cookies, and a melty chocolate middle that makes for the ultimate monster-worthy bite that lives up to their Cookie Monster name.
I whipped these up first with my niece when she spotted the TikTok version scrolling on her phone. Her jaw dropped when we pulled out the finished batch! We've baked them together multiple times now, with her swearing they're the "most amazing cookies ever" while sporting a cute blue-tinted grin from munching them hot from the oven.
Essential Cookie Components
- Butter forms that lush, soft foundation all good cookies need—just make sure it's nice and soft for better mixing
- Brown sugar brings richness and moisture from its molasses—its slight caramel notes really boost the chocolate taste
- White sugar works with the brown sugar to create those crunchy edges everybody craves
- Eggs hold everything together while adding fluffiness during beating—don't rush the mixing stage
- Vanilla offers that subtle base flavor that makes everything pop—stick with real extract if you can
- Blue food coloring turns basic dough into Cookie Monster magic—gel types work better for bright color without thinning the dough
- Chocolate chips in dark and white varieties create yummy contrast and look great too
- Broken Oreos add that famous cocoa-cookie snap that makes these cookies stand out
- Crunchy chocolate chip cookies bring another texture level—those tiny store-bought ones are perfect here
- Chocolate discs create the gooey center that makes everyone smile—regular chips won't melt the same way
 Save
Save
Fantastic Monster Assembly
Creamy FoundationBegin by beating your soft butter with both sugars. Let them hang out in your mixer for a full minute, watching them change from gritty to silky. This first step can't be rushed if you want cookies with just the right bite—not too fluffy, not too flat.
Airy Blue WonderDrop in your eggs and vanilla, then let the mixer run for three whole minutes. This long mixing puts lots of air into your batter, helping the cookies puff up nicely when baking. Once everything looks light and fluffy, mix in enough blue coloring to get that real Cookie Monster look. I usually add tiny amounts until it seems right—keep in mind the color will fade slightly when flour goes in.
Adding Dry StuffStir in your flour, salt, and baking powder just until the white streaks vanish. Too much mixing now can make your cookies tough, so go easy. Your dough should look like smooth blue satin—even color throughout.
Loading Up ExtrasFold in your chocolate chips and cookie pieces until they're spread through the dough. This part gives these cookies their monster personality—packed with goodies everywhere you bite.
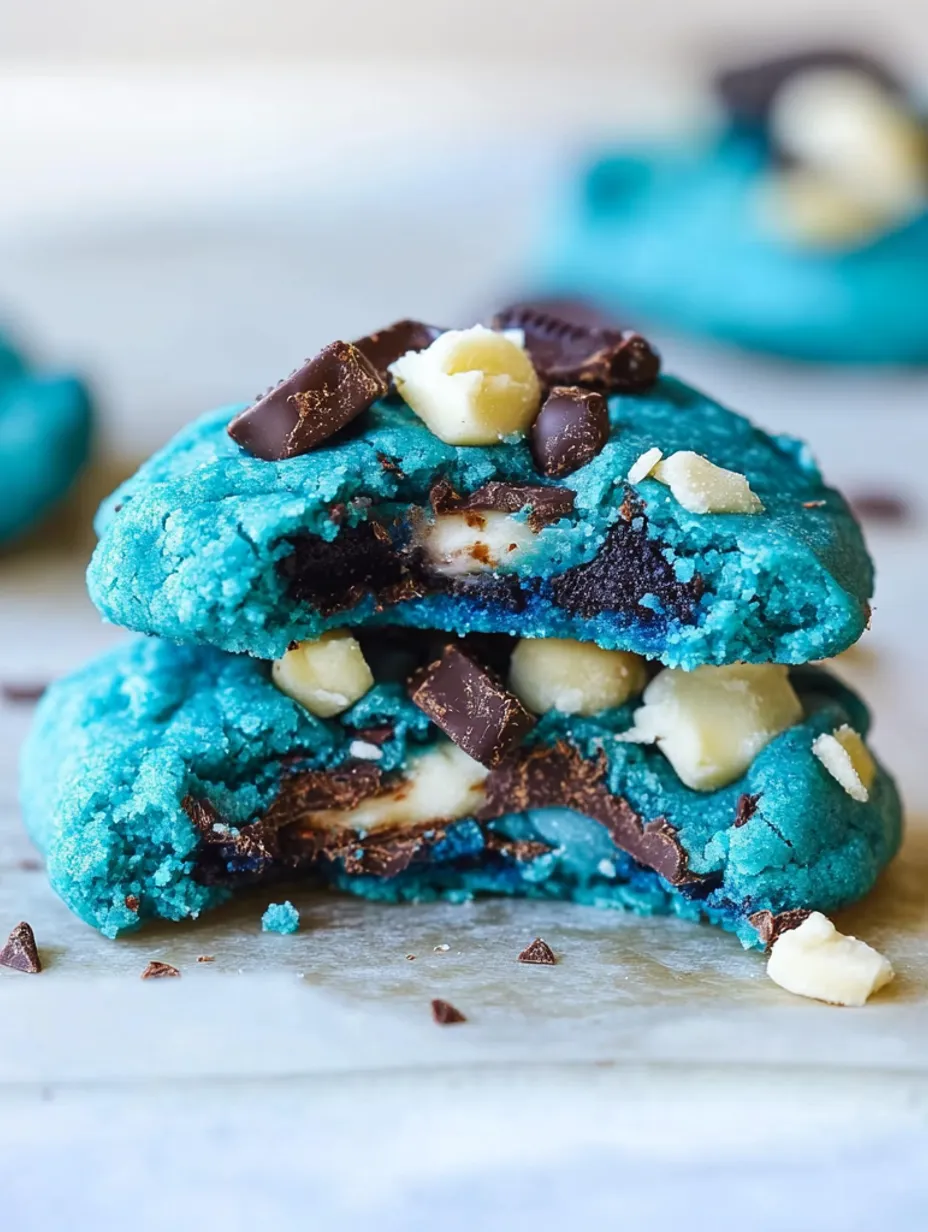
Hidden TreasureGrab about two spoonfuls of dough and press it flat in your hand. Put 2-3 chocolate discs in the middle, then fold the edges of the dough around the chocolate. Add another two spoonfuls on top, pinching the edges to totally cover the chocolate. This secret center creates that wow-worthy melty middle when someone breaks the cookie open.
Tasty ToppingPush some extra cookie chunks and chocolate chips into the top of each dough ball. This doesn't just make them look cooler but makes sure that classic monster texture jumps out from first glance.
Baking Know-HowPut these monsters far apart on your cookie sheet—around six per normal tray. They need space to grow without turning into one massive cookie (though that sounds pretty good too). Bake until the outside edge looks set but the middle still seems soft, roughly 10-12 minutes. This creates that perfect mix of crispy outside and gooey inside.
My very first try at these didn't have enough blue coloring, and my kid looked at them and said, "Mom, those aren't monster cookies, they're just sad blue cookies." Got it! Don't hold back on the color—Cookie Monster isn't light blue, he's bold and bright. Now we add color until someone yells "THAT'S COOKIE MONSTER BLUE!" which has become our family's measuring system.
Ways To Enjoy
Eat these while they're warm for best results, when the middle chocolate is still flowing and totally tempting. They go great with cold milk (naturally) but also taste amazing with coffee for grown-ups. For a totally over-the-top treat, put soft vanilla ice cream between two cookies for a monster ice cream sandwich that'll make everyone gasp.
Fun Twists
Try putting peanut butter cups in the center instead of chocolate discs for a nutty lover's treat. During Christmas, switch to red or green coloring and seasonal cookies for mix-ins to make holiday monster cookies. For birthday parties, mix rainbow sprinkles into the dough and use white chocolate centers for a birthday cake twist.
Keeping Them Fresh
These cookies taste best within two days, when the difference between crunchy edges and soft middle is most noticeable. Keep them loosely covered at room temp so they don't get too soft. If you need to store them longer, freeze cooled cookies in a sealed container with wax paper between layers. When a cookie craving hits, let them warm up naturally and heat quickly in the microwave for that just-baked feeling.
 Save
Save
Smart Baking Tricks
- For cookies with perfect circles, run a big round cookie cutter or glass around each one right after baking
- If you can't find chocolate discs, broken chocolate bars work pretty well too
- Cooling the dough balls in the fridge for 30 minutes before baking helps stop them from spreading too much
My son's teacher asked me to bring these for the class party after seeing pics on my phone. I worried about twenty kids with blue-stained teeth, but she just smiled and said, "We're doing Monster stories that week—it fits perfectly!" The cookies were such a hit that parents started texting for the recipe before school even ended. Just know you'll forever be tagged as "the monster cookie maker" once you share these anywhere!
Recipe FAQs
- → Why are my cookies spreading too much?
- The butter might be too soft. Chill the dough for about 30 minutes to firm it up and help hold the shape while baking.
- → Which type of food coloring works best?
- Go for gel food coloring. It gives a brighter shade without messing up the dough's consistency. Start small, then add more as needed.
- → Can I skip the chocolate center?
- Yep, you can! Just leave out the filling step and bake them with all the other yummy mix-ins.
- → Can I store the dough in the freezer?
- Sure thing! Scoop dough balls, freeze on a tray, then transfer to a bag for up to 3 months. Toss straight into the oven and extend baking by a minute or two.
- → What makes these 'Monster' cookies?
- The bright blue color (like the lovable Cookie Monster) and being stuffed with cookies and chocolate make them totally monster-themed!
- → How do I check if the cookies are done?
- The edges should be firm, and the middles will appear slightly undercooked. They'll finish setting while cooling on the baking sheet, keeping the centers soft.
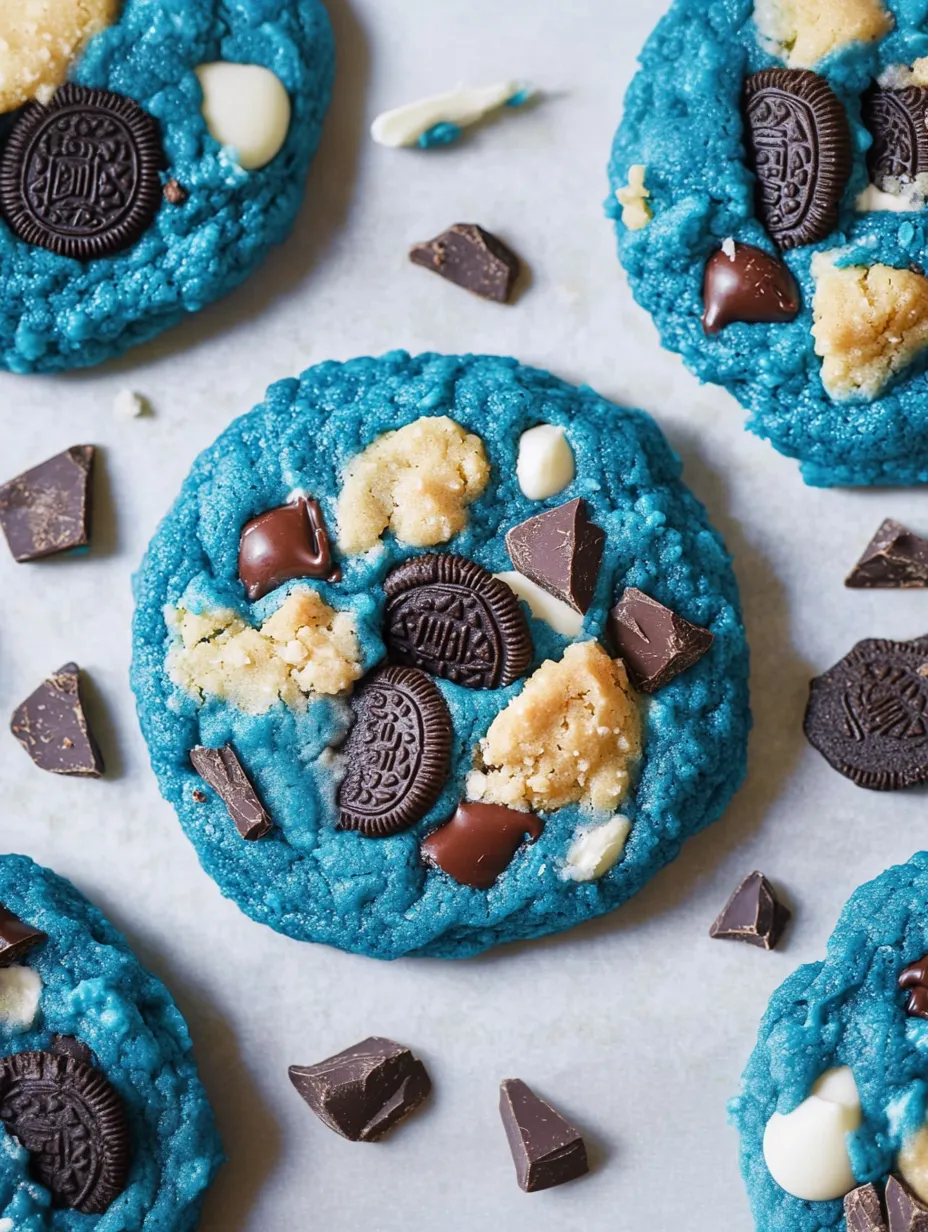
Blue Monster Cookies
Soft blue cookies loaded with Oreos, chocolate chips, and cookie pieces. Gooey centers and a colorful look make them a playful favorite!
Ingredients
→ Base Layer
→ Add-ins
→ Decorations
Steps
Turn the oven on to 350°F. Combine butter and both sugars in a large bowl, beating for about a minute until they're blended well.
Mix in the eggs and vanilla until the texture turns pale, fluffy, and light. This should take about 3 minutes. Add a few drops of blue food dye, going as vibrant as you'd like for that Cookie Monster look!
Pour in the baking powder, salt, and flour and mix just enough so you can't see white flour streaks anymore. Don't overwork it; gentle mixing works best here.
Carefully stir in the semi-sweet chocolate chips, white chips, crumbled Oreos, and crispy mini cookies. If the dough feels too sticky, chill it for half an hour before using.
Scoop out 2 tablespoons of dough, flatten it, and pop a piece or two of milk chocolate in the middle. Wrap the dough around the chocolate to cover it, then make a sandwich with 2 more tablespoons of dough on top, sealing the edges.
Stick extra chips, Oreo crumbs, and cookie pieces on top of each cookie ball. This makes them look extra packed with goodies.
Lay the cookies on parchment-lined or greased trays, leaving lots of space in between for spreading. Bake 10-12 minutes, then cool on the tray for 5 minutes before moving to a rack.
Notes
- For crispy cookie chunks, Famous Amos works best, followed by Chips Ahoy minis.
- These cookies spread a lot, so allow for extra spacing on your baking sheet.
- Edges should look solid when done baking, but the center should seem underbaked. It'll firm up as it cools.
Required Tools
- A stand or hand mixer with a large bowl
- Baking trays
- Silicone baking mats or parchment paper
- Wire rack for cooling
- Measuring spoons and cups
Allergy Information
Check each ingredient for potential allergens and consult a healthcare professional if needed.
- Wheat is present (in flour, Oreos, and crispy cookies)
- Includes dairy (butter, chocolate)
- Eggs are used
- Chocolate chips might have soy, check labels to confirm
Nutritional Facts (per serving)
These details are provided for informational purposes and aren't a substitute for medical advice.
- Calories: 366
- Fats: 17 g
- Carbohydrates: 49 g
- Proteins: 4 g