
 Save
Save
I switched from regular cinnamon rolls to this braided version last year, and it totally changed my baking approach! These twisted treats look fancy enough for special events but aren't actually much tougher than standard rolls once you get comfortable with the twisting method.
After bringing these to a family get-together, my brother's wife begged me to show her the technique, and we've made it our tradition to bake them together on Christmas Eve ever since.
Essential Ingredients
- Yeast dough: A soft, rich dough forms the base of amazing cinnamon rolls. We're using milk, eggs and butter to get that dreamy softness.
- Cinnamon filling: Mix butter, brown sugar, and cinnamon for that sweet, spicy middle that everyone loves.
- Time: Don't rush the multiple rise periods - they might seem like a pain but they're key for the right texture.
- Flat surface: You'll need enough counter room to spread out when you're doing the braiding part.
 Save
Save
My Baking Process
Getting the Dough RightI've learned that ingredient temperature really matters for success. Room temp eggs and barely warm milk help your yeast work properly. You'll know the dough is ready when it feels smooth and doesn't stick to the bowl anymore - if it's too sticky, just add flour one tablespoon at a time until it feels right.
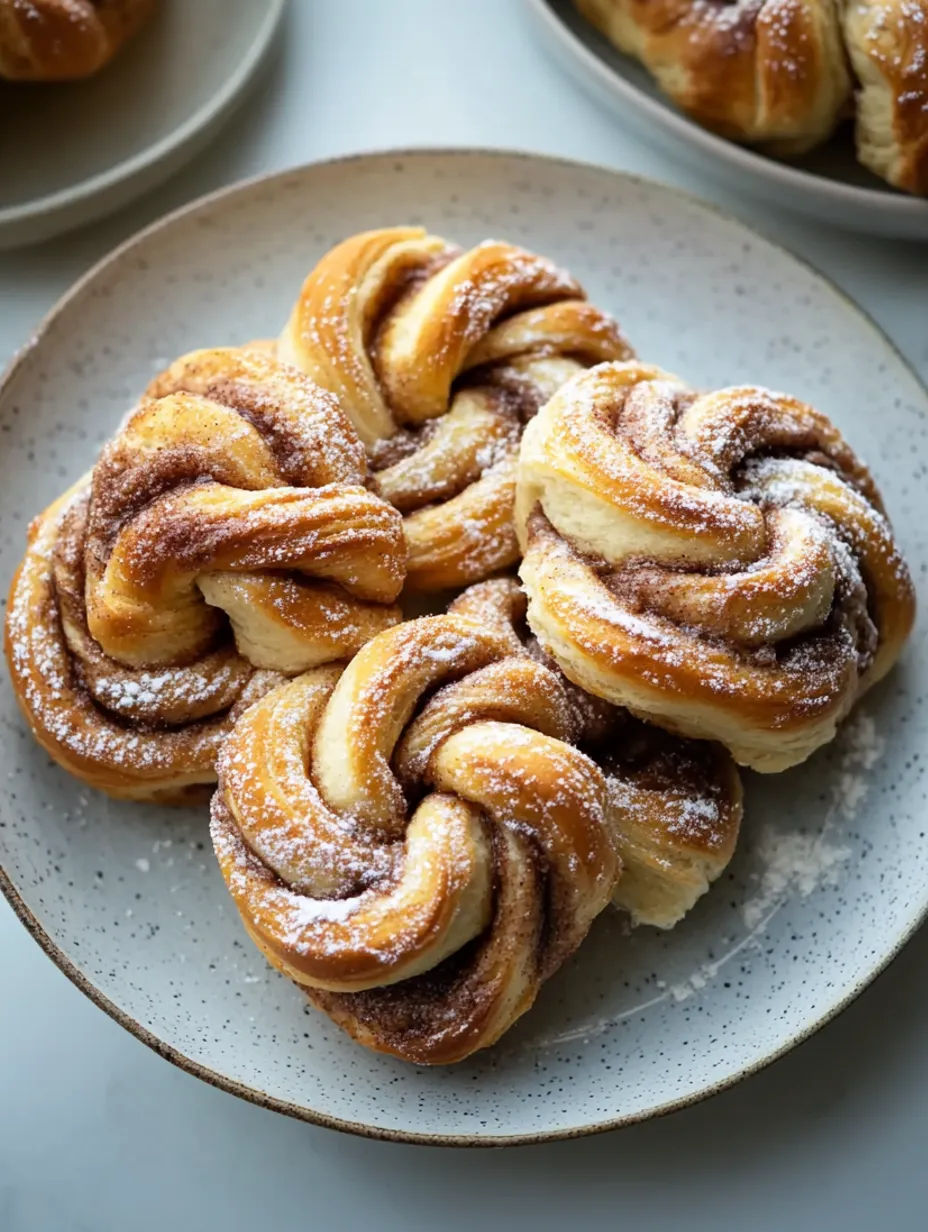
Adding Your FillingUnlike regular rolls where filling goes on just one surface, the way you fold and layer creates gorgeous cinnamon swirls throughout these buns. Make sure you spread filling right to the edges for the best flavor in every bite.
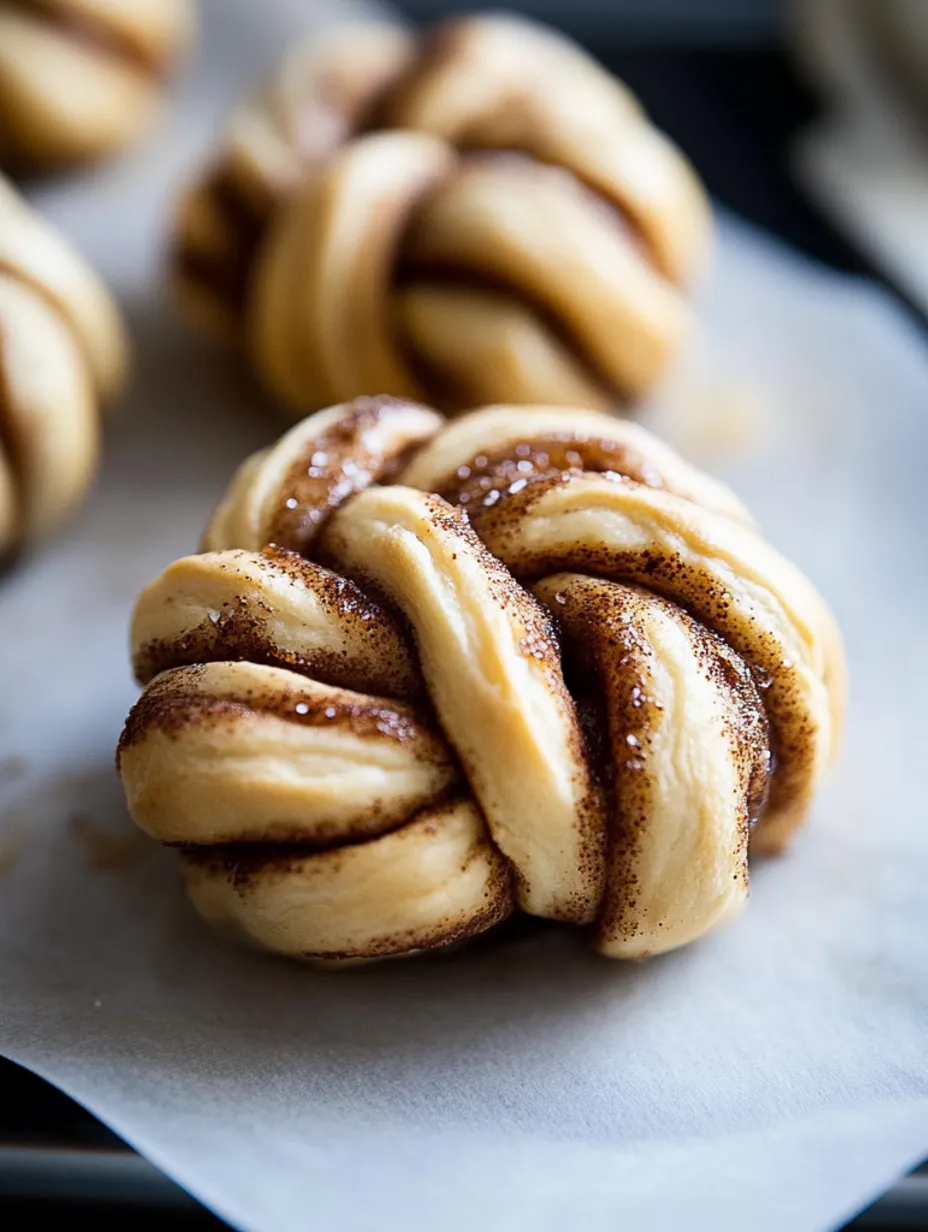
Creating the BraidsThis step scared me at first, but after one try, I realized it's actually pretty simple - just different from what I was used to! Use a sharp knife instead of a pizza cutter for cleaner cuts. If your dough gets too warm and sticky while working, pop it in the fridge for 5 minutes to firm up again.
Don't Skip the Final RiseYou might want to rush through the second rise, but don't! This is when real transformation happens. The braided shapes will puff up almost twice their size and turn incredibly soft. Cover them with a light kitchen towel so they don't dry out while rising.
I picked up this recipe from my grandma's Swedish friend who called them "kanelbullar," though she shaped them a bit differently. My first attempt failed because I rolled them too tightly, which stopped the middle from rising properly. Now I keep the coil looser, and they puff up perfectly.
Presentation Suggestions
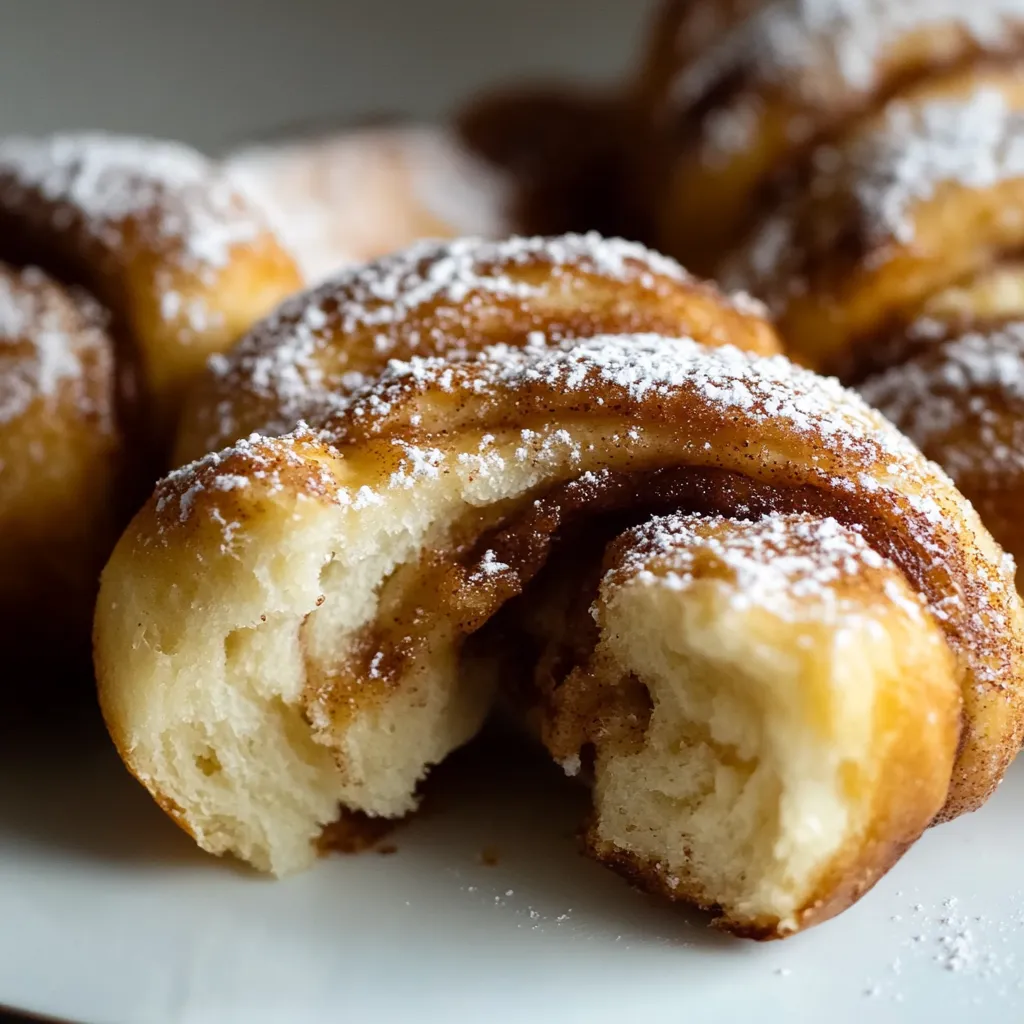
These rolls look stunning with just a light dusting of powdered sugar that shows off the braided design. When serving for brunch, I place them on a wooden platter with scattered fresh berries. They taste amazing with coffee, especially varieties with nutty flavors that go well with cinnamon.
Customization Options
Add some orange zest to the filling for a fresh twist. Mix cardamom into the dough for a Nordic touch. Instead of thick frosting, try a simple thin glaze made from powdered sugar and cream - just enough sweetness without hiding the pretty pattern. During Christmas, I sometimes throw chopped pecans into the filling for extra crunch.
Keeping Them Fresh
They taste best fresh out of the oven, but will stay good about 2 days if kept in an airtight container. To warm them up, wrap loosely in foil and heat in a 300°F oven for 5-7 minutes. You can also freeze them individually wrapped, then thaw overnight in your fridge and warm before eating.
 Save
Save
Expert Suggestions
- Grab a ruler when cutting the strips so all your buns turn out the same size
- Give them plenty of time to rise - that's the secret to their fluffy texture
- Want them super gooey? Just double up on the filling mixture
- For morning baking, let the first rise happen in your fridge overnight
There's something really rewarding about making these braided cinnamon buns - from watching the dough grow to creating those stunning twisted shapes. They don't just taste amazing but look genuinely impressive, perfect for when you want to show someone you care through your baking.
Recipe FAQs
- → Can I prep the dough ahead of time?
- Definitely! Chill the prepared dough overnight, then leave it out for 30 minutes before shaping and adding the filling.
- → What if I’m missing a stand mixer?
- No worries! You can stir everything in a big bowl with a wooden spoon, then knead by hand on a floured counter for 8-10 minutes until smooth.
- → Is it possible to freeze them?
- Sure thing! Freeze them shaped but unbaked after step one or fully baked once they cool down completely.
- → Why is my dough sticking too much?
- Sticky dough happens! Add a spoonful of flour at a time while kneading until it feels smooth but not overly sticky.
- → Can I mix in nuts or raisins?
- Yep! Sprinkle 1/2 cup of your favorite chopped nuts or raisins into the filling for some extra pizazz.
Braided cinnamon buns
Fluffy dough braided with a sugary cinnamon mix for a scrumptious morning bite that’s as pretty as it is tasty.
Ingredients
→ Dough
→ Cinnamon Filling
→ Topping
Steps
Using a stand mixer fitted with a dough hook, toss in milk, butter, eggs, yeast, flour, sugar, and salt. Run the mixer on a low setting for 2 minutes first, then bump it up to medium for 6-8 minutes. The dough will start to come away from the bowl's sides and should feel soft, not super sticky.
Form the dough into a ball and put it in a clean bowl that's lightly floured. Drape a kitchen towel over the top and let it hang out for about 45 minutes until it grows to twice the size.
While the dough's rising, blend brown sugar, butter, and cinnamon together until smooth. Use a stand mixer with a paddle or just mix it by hand with something simple like a fork.
Dust your surface with flour and roll out the dough into a roughly 12x16-inch rectangle. Smear the cinnamon filling all over the dough evenly.
Fold the dough into thirds, like folding a piece of paper for an envelope, with the long side closest to you. Cut into 12 strips about 1.5 inches wide, then slice each strip lengthwise twice so you get three strands per strip.
Braid the three strands of each strip together. Roll those braids into buns and arrange them on a parchment-covered baking sheet. Keep them spaced out to allow for puffing up.
Cover the braided buns with a tea towel. Let them rise in a cozy spot for an hour or until they've doubled in size.
Heat your oven to 350°F. Brush the tops with the beaten egg wash and bake for 20-25 minutes until they turn a lovely golden color.
Pull the buns out of the oven and place them on a wire rack to cool for 5 minutes. Sprinkle powdered sugar over the top and serve warm.
Notes
- Adapted from a Gozney Recipe idea.
- You can swap bread flour for all-purpose if needed, but bread flour gives a better chew.
- These buns taste awesome when they're still warm but not piping hot.
Required Tools
- Stand mixer with dough hook and paddle (if using)
- Big mixing bowl
- Flat rolling pin
- Sharp blade or knife
- Baking tray
- Pastry brush for egg wash
Allergy Information
Check each ingredient for potential allergens and consult a healthcare professional if needed.
- Contains dairy (milk, butter)
- Contains eggs
- Contains gluten (flour)
Nutritional Facts (per serving)
These details are provided for informational purposes and aren't a substitute for medical advice.
- Calories: 320
- Fats: 15 g
- Carbohydrates: 42 g
- Proteins: 5 g