
 Save
Save
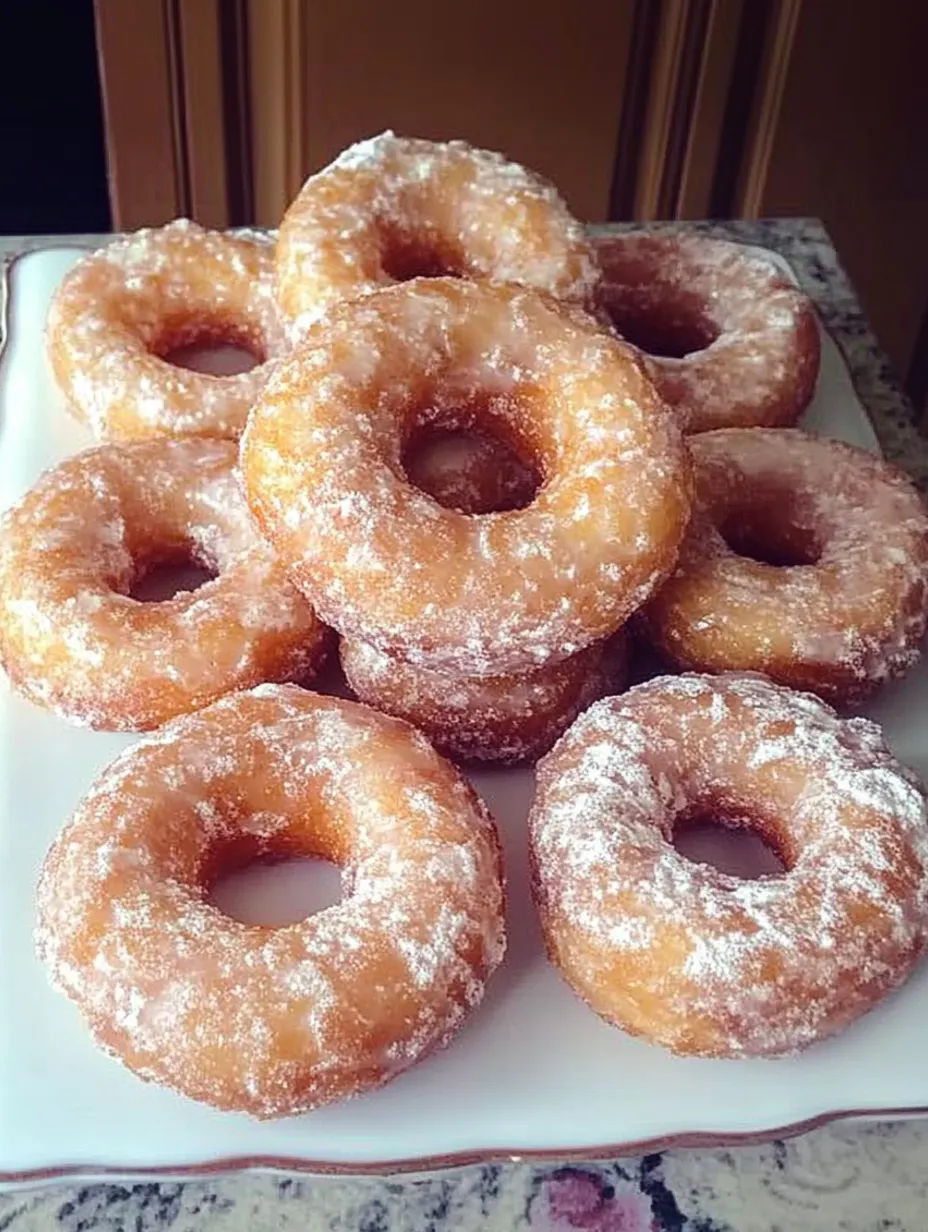
Cake donuts with an old-fashioned twist give you that amazing combo of crispy outside and soft, cake-like inside that's made them a top pick at bakeries everywhere. Those rough edges and hints of nutmeg and cinnamon make each bite pure comfort food—perfect with your coffee or as a snack later in the day.
I found out how to nail these old-fashioned donuts when my elderly neighbor let me in on her family's secret. What really sets this apart is using more egg yolks than usual and cutting little triangle notches in the dough before cooking. Those tiny cuts create those bumpy edges that catch extra glaze in every mouthful.
Essential Components
- Regular flour forms the foundation for these cakey treats
- Sour cream adds juiciness and that distinctive tang old-fashioned donuts need
- Egg yolks bring richness and help them turn that lovely golden color during frying
- Nutmeg stands out as the key spice—don't cut corners here or you'll miss the authentic taste
- Butter delivers a depth that recipes using just cooking oil can't achieve
- Baking powder combined with baking soda creates just the right lift and consistency
 Save
Save
Baking Approach
Powdery MixtureStart by sifting flour, baking powder, and baking soda together for even distribution. Mix in cinnamon, nutmeg, and salt afterward. This careful blending stops any unpleasant clumps of raising agents in your finished donuts.
Butter BlendIn another bowl, mix sugar, butter, and egg yolks until they're fluffy and light—roughly two minutes of beating. This puts air bubbles in the mix which helps create that nice cakey feel. Fold in sour cream until just combined. The sour cream's acid works with the baking soda to help your donuts puff up properly.
Light FoldingPut your dry stuff into the wet mix bit by bit, about a third each time, stirring gently between. Don't mix too much or you'll end up with tough donuts instead of soft ones. Stop as soon as the flour vanishes—a few tiny lumps are better than overmixing.
Cool-down TimeWrap your dough tightly and stick it in the fridge for at least an hour, but leaving it overnight works even better. This waiting lets the flour soak up moisture and the gluten relax, making softer donuts. Cold dough is also way easier to work with and cut cleanly.
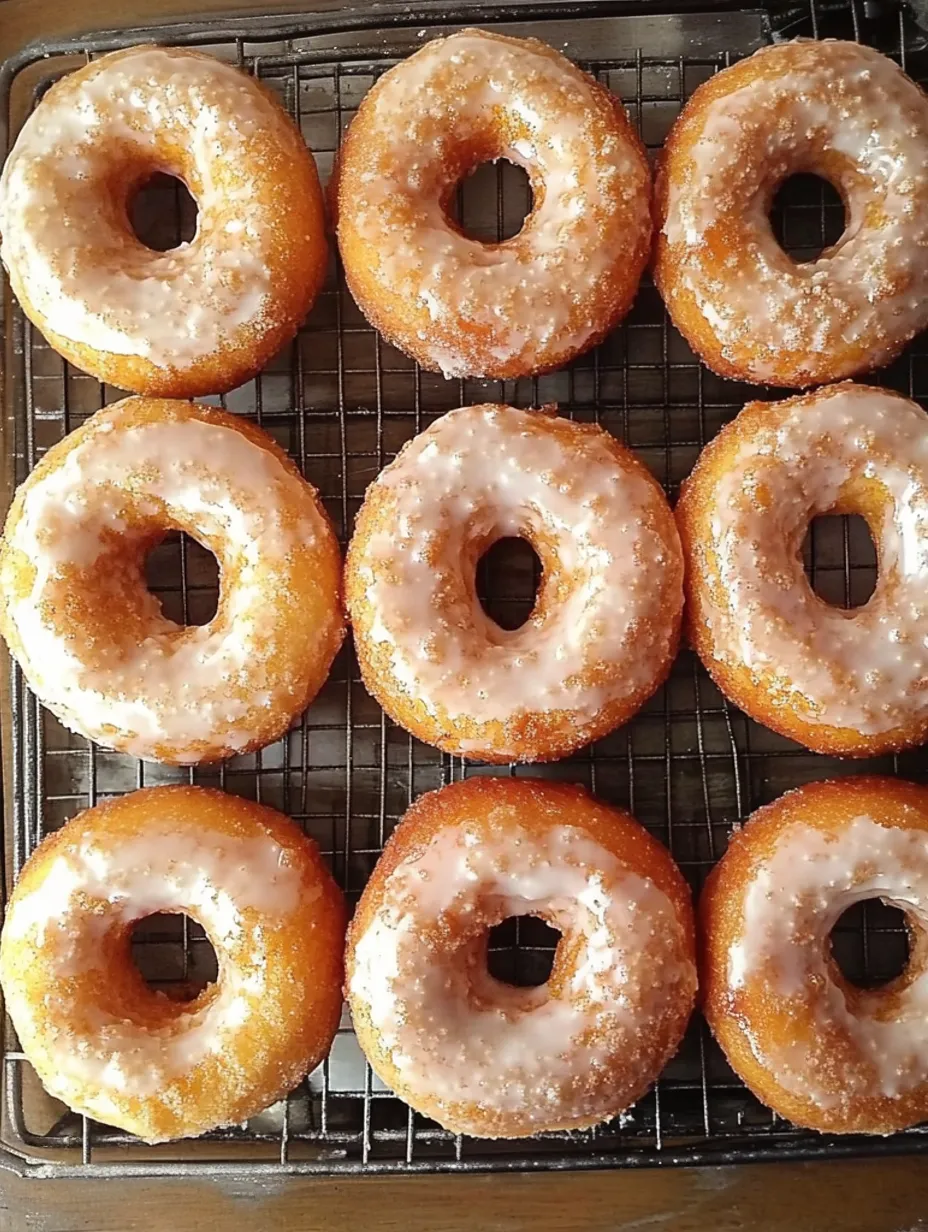
Cutting MethodRoll your cold dough on a floured counter until it's about 1/2 inch thick. Use a floured cutter for the circles, then make the holes with something smaller. Don't forget to make three small triangle cuts around the outside—this creates those famous rough edges that grab extra glaze.
Oil TemperatureGet your oil to exactly 350°F—this temp is super important. Too hot and the outside burns before the middle cooks; too cool and they'll soak up too much oil. Cook just a few at once to keep the oil hot, turning them when they float up, and cook about a minute until they're golden on both sides.
Sweet CoatingLet your donuts cool a bit on a rack before dipping them in glaze. For best taste, dip when they're still warm enough for the glaze to soak in a little but cool enough to handle without breaking—about 3-5 minutes after frying.
My grandma made these donuts on special Sunday mornings, and that smell of nutmeg and hot dough takes me right back to her kitchen. She always kept the donut holes for me, saying they were just "cook's treats," but I later found out she knew all along they were what I loved most.
Tasty Pairings
Enjoy these donuts at room temp with some coffee or tea for the classic experience. Want something fancier? Warm them up a bit and add a scoop of vanilla ice cream with some caramel drizzled on top. They're also great with hot apple cider or cocoa when it's chilly outside.
Fun Twists
Try adding orange zest to the dough in fall or lemon zest in spring for a seasonal touch. Switch up the plain glaze by mixing in some maple syrup instead of milk. If you love chocolate, dip half the glazed donut in melted chocolate or add cocoa to the glaze. During holiday time, throw in a bit of cardamom for a festive flavor.
 Save
Save
Keeping Fresh
These donuts actually get better with time as the flavors mix together. Keep them in a sealed container at room temp for up to two days. Need to store them longer? Freeze the unglazed donuts in a single layer, then let them thaw and add glaze before eating. Don't put them in the fridge as they'll go stale faster.
Smart Donut Tricks
- Touch the dough as little as you can after adding flour for the softest results
- No donut cutter? Just use a drinking glass and bottle cap for the middle
- Want thinner glaze? Warm it slightly. Prefer thicker coating? Use it at room temp
The first time I made these for my kids, my boy took one bite and said, "These are REAL donuts!" after only knowing the fluffy yeast kind from donut shops. There's something really satisfying about that substantial cake texture with sweet glaze that makes these old-fashioned donuts feel like a true treat rather than just a quick sweet snack. We now make them for first-day-of-school breakfasts, with everyone crowding around to watch the frying and glazing magic before heading out.
Recipe FAQs
- → Where does the name come from?
- They're called old-fashioned because of the traditional way they're made—no yeast, just a cake-like dough with a cracked texture after frying.
- → Can I use the oven instead?
- Baking works if you use a donut pan at 350°F for around 15 minutes, but they won't have the same crispy crust as fried ones.
- → Why is chilling the dough important?
- Cold dough is less sticky and easier to handle. It also improves the texture by relaxing the gluten, so don't rush this step!
- → Can I prep them early?
- Yes! Dough keeps in the fridge for one day or freeze cut-out donuts for a month. Fry frozen ones—just add a little more cooking time.
- → What if I lack a donut cutter?
- Use a big round cutter (about 3 inches) and a small cutter (1 inch) for holes. Improvise with a glass and cap if needed!
- → How can I check oil temperature?
- 350°F is ideal. Use a fryer thermometer, or test with a tiny dough piece—it should bubble and float slowly without browning too fast.
Old-Fashioned Cake Donuts
Sour cream cake donuts with a crunchy outside and soft, fluffy middle. Dip them in a delicious vanilla icing for that bakery-quality experience!
Ingredients
→ To Make the Donuts
→ To Make the Sweet Glaze
Steps
Mix together the flour, cinnamon, nutmeg, baking soda, baking powder, and salt in a big bowl. Put aside for later.
With an electric mixer, beat the sugar, butter, and egg yolks for a couple of minutes until smooth and fluffy.
Add the sour cream into the fluffy sugar and butter mixture. Stir until it feels silky and everything blends in.
On a low speed, fold the dry mixture into the wet one bit by bit. Stop as soon as they come together—don’t overwork it or the donuts might lose their tenderness.
Wrap the dough in some plastic wrap and pop it in the fridge for an hour or more. It'll firm up and be easier to roll out.
Take the chilled dough and roll it flat on a floured counter until it’s about 1 cm thick. Cut out your donut shapes (and holes) with a donut cutter. If you’d like, add 3 small triangle cuts around the edges for a classic cracked look.
Use a large pot or deep fryer to warm up the oil until it hits 350°F (175°C). Keep track of the heat with a thermometer so it doesn’t get too high or low.
Gently lower the donuts into the hot oil, a few at a time so they don’t crowd each other. Fry them for about 1 to 1½ minutes on both sides until they’re a nice golden shade. Smaller pieces, like the donut holes, will fry faster.
Pull the donuts from the oil using a slotted spoon. Place them on paper towels to soak up any extra oil, and let them cool slightly.
As the donuts cool, whisk the salt, milk, and powdered sugar together in a bowl until you’ve got a smooth glaze. Add more milk or sugar if the consistency’s not quite right.
Take each donut and dip just the top into the glaze. Let the extra drip off, then place them on a wire rack over a baking sheet to set. Once the glaze hardens, they’re ready to go!
Notes
- These treats are best eaten fresh, ideally within hours of frying.
- For that classic cracked look, those tiny triangle cuts along the edges before frying can make a difference!
- Try to keep the oil’s temperature steady at 350°F. If it gets too hot, the donuts might cook too fast on the outside and stay raw inside. Too cool, and they’ll soak up too much grease.
Required Tools
- Electric mixer
- Big bowls for mixing
- Circular donut cutter
- A rolling pin
- Deep pot or fryer
- Frying/candy thermometer
- Spoon with slots
- Absorbent paper towels
- A cooling rack
Allergy Information
Check each ingredient for potential allergens and consult a healthcare professional if needed.
- Includes gluten (flour)
- Contains dairy (sour cream, butter)
- Eggs are included
Nutritional Facts (per serving)
These details are provided for informational purposes and aren't a substitute for medical advice.
- Calories: 285
- Fats: 9 g
- Carbohydrates: 48 g
- Proteins: 4 g