
 Save
Save
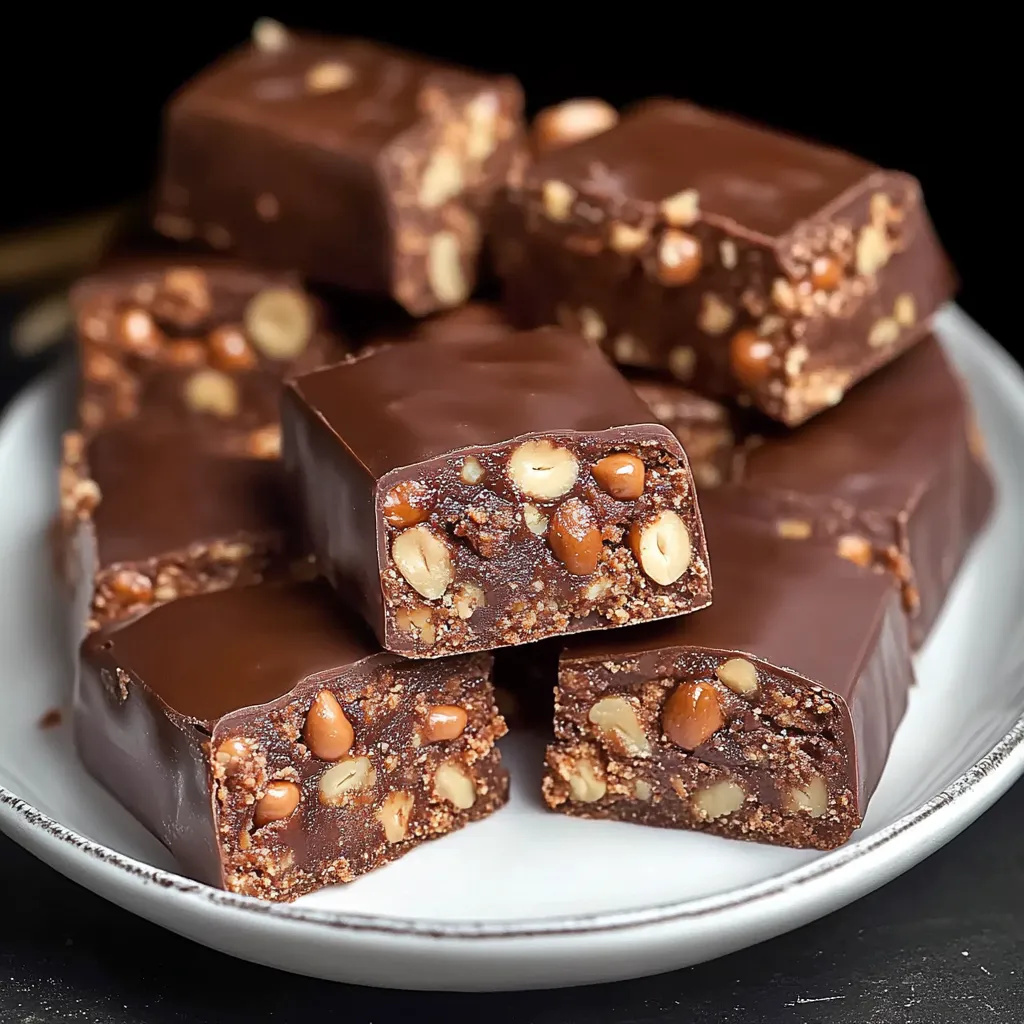
I stumbled upon these chocolate biscuit bars during a crazy hot summer five years back. My kitchen felt like a furnace, but my craving for sweets wasn't backing down. These treats kept me sane - and now they're what I turn to when I want something rich without turning on the oven. There's this wonderful thing about the mix of crunchy biscuits, warm peanuts and silky chocolate that tricks folks into thinking you worked forever in the kitchen. Just between you and me, waiting for them to harden is the toughest part.
My neighbor has this son Tommy who hardly eats anything - he once turned down birthday cake because it didn't "look right." But these bars? He gobbled up three in one go last time I brought them to a neighborhood cookout. His mom messaged me at midnight wanting to know how to make them because he couldn't stop talking about them. That's when I knew this was a winner.
Essential Tools
- Biscuits: I typically use digestives or graham crackers, but really, any plain crispy cookie does the job. The plainer ones actually work better as they let the chocolate flavor stand out. I tried leftover gingersnaps once during the holidays and they turned out fantastic.
- Ground peanuts: Always toast them first - it's a quick 5 minutes in a dry skillet and makes all the difference. I sometimes swap half for hazelnuts when I'm feeling a bit fancy. Just grab unsalted ones unless you're going for that sweet-meets-salty flavor.
- Cocoa powder: Grab the nice stuff if you can. I went through a stint buying the cheapest kind and could really tell something was off. Dutch-processed gives you a gentler taste, but regular works just fine if that's all you've got.
- Chocolate mix: The milk-dark combo isn't something I'll budge on. All milk gets too sweet and all dark gets too bitter. That 3:1 balance hits just right. I've used fancy chocolate bars cut up versus baking chips, and honestly couldn't spot much difference once it's all melted down.
- Sweet cream: Heavy whipping cream gives these bars that wonderful melt-away quality. I tried using milk once when I ran out of cream. Let's just say some shortcuts aren't worth taking.
 Save
Save
Creating Delicious Treats
- Base preparation:
- Break those biscuits right - not too dusty, not too chunky. I go for mostly small bits with a few bigger pieces for some texture. Toss them in a large bowl with your ground nuts, sugar, and cocoa. Mix everything thoroughly - nobody wants to bite into a bunch of pure cocoa powder.
- Getting the moisture right:
- Melt the butter gently - I've burned it countless times when I tried to rush. Once melted, mix in the cream until blended. Pour this over your dry stuff and stir with a wooden spoon. You'll know it's perfect when you can squeeze some in your hand and it sticks together without being wet. Go with your gut here.
- Creating the perfect base:
- Put parchment paper in your pan with extra hanging over to pull the bars out later. Push that mixture down hard - I mean HARD. I use a measuring cup bottom and really put some effort in. This pressing down matters a ton or your bars will break apart when you cut them.
- Nailing the chocolate layer:
- Melt your chocolates slowly, either with short bursts in the microwave or in a bowl over steaming water. Stir often - chocolate can go from smooth to ruined in moments if you're not watching. Adding that little bit of oil helps the coating cut clean instead of cracking when you slice it.
- The finishing touches:
- Spread that shiny chocolate over your cold base, making sure to reach all the edges. Sprinkle the ground peanuts on top right away - wait too long and they won't stick. I like to press them down softly with the back of a spoon.
My first try with these bars was awful - I didn't press the base down enough and ended up with crumbs everywhere. The next time, I went too far with the cream and made something more like pudding than bars. Over time I've changed everything from how many biscuits to nuts I use to how long they need to chill. The recipe I'm sharing now has been tested through tons of gatherings and family events. The biggest change came when I started toasting the nuts first - such a tiny step that makes such a big difference.
Impressive Serving Suggestions
For fancy dinners, I cut these into tiny squares and put them next to fresh raspberries with a small scoop of mascarpone cream. The slight sourness balances the richness perfectly. When friends come for coffee, I set them on my grandma's old cake stand with some fresh mint for color. They also make ice cream taste amazing - just break a bar over vanilla ice cream and get ready for pure bliss.
Try New Flavors
After making these bars about a million times, I've tried so many different versions. Switch half the peanuts for coconut flakes for a beach-inspired twist. Put a spoonful of instant coffee in the chocolate mix for a coffee version that goes great with afternoon tea. During Christmas, I put crushed candy canes on top instead of nuts. My favorite change is adding a layer of salty caramel between the biscuit bottom and chocolate top - it takes more work but tastes incredible.
Stays Good Forever
These bars stay fresh in the fridge for about a week, though they've never stuck around that long at my place. Keep them in a sealed container with parchment between layers so they don't stick together. They're actually totally fine at room temp for a day or so, which makes them perfect for outdoor parties or shared meals. You can freeze them too - just wrap each piece and let them thaw in the fridge overnight. The texture holds up surprisingly well.
 Save
Save
I've whipped up these no-bake chocolate biscuit bars for everything from school fundraisers to elegant dinner parties. There's just something about their not-too-sweet richness and perfect bite that practically everyone loves. My dad, who always says he "doesn't care for sweets," has been caught sneaking them from the fridge late at night. I've spotted him in the act many times. While I enjoy tackling tricky recipes as much as anyone, there's something really satisfying about making something this tasty with so little effort. Just don't tell your guests how quick they were to make - let them think you spent all day on them.
Recipe FAQs
- → What kind of cookies can I use?
- Simple cookies work best like gram crackers, digestives, or tea biscuits. They should easily crumble and not be overly sweet.
- → Can I skip the peanuts?
- Sure, swap them for almonds, hazelnuts, or walnuts. For no nuts, try seeds, pretzels, or more cookie crumbs.
- → My mix won't stick together—what's wrong?
- It needs more moisture. Slowly add cream, a bit at a time, while ensuring your butter’s melted fully beforehand.
- → Can I switch up the chocolate on top?
- Of course! Use dark, milk, or even white chocolate. If you pick white, reduce added oil since it melts differently.
- → Do I need to keep them cold?
- Yes, pop them in the fridge to store. They’ll stay fresh for up to a week. Serve them cold or at room temperature.
- → Can I experiment with flavors?
- Go for it! Add orange zest, coffee powder, or even a splash of liqueur. Dried fruits like cherries or cranberries are great extras.