
 Save
Save
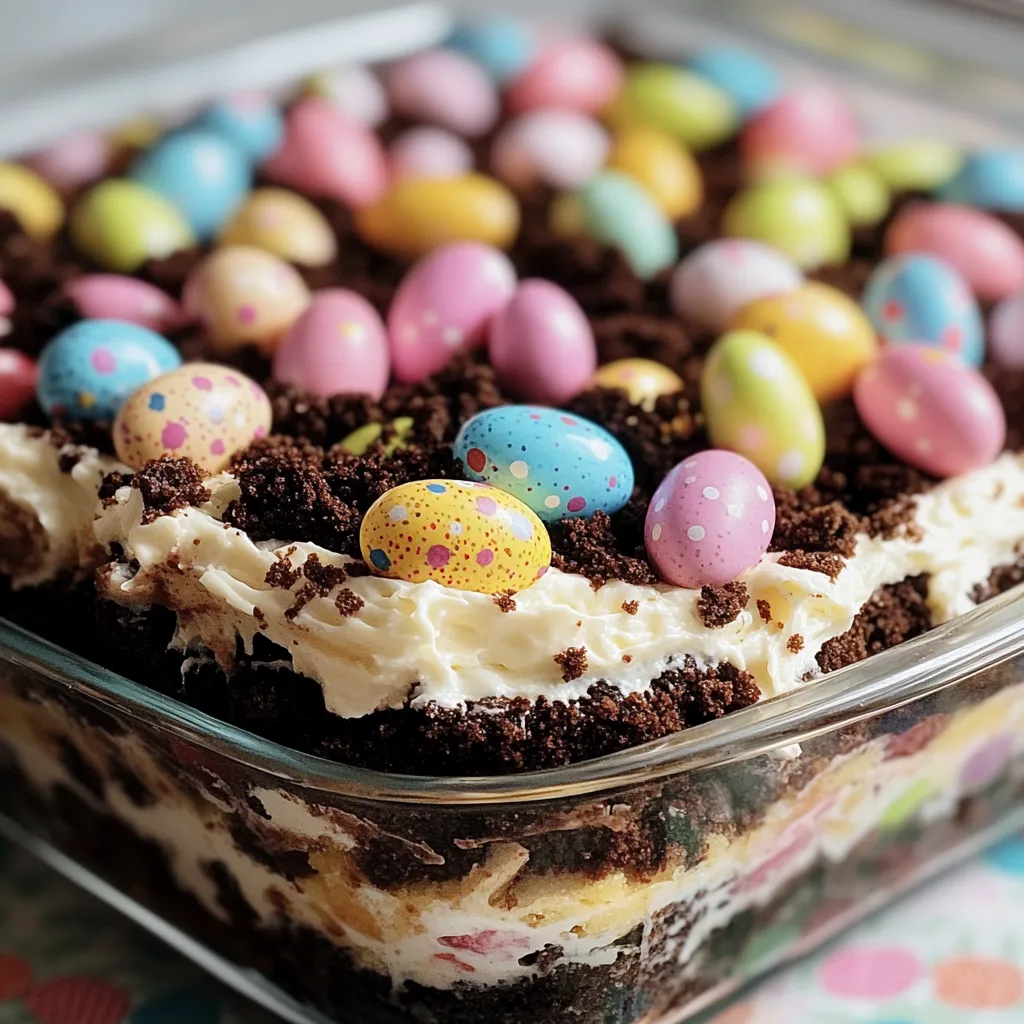
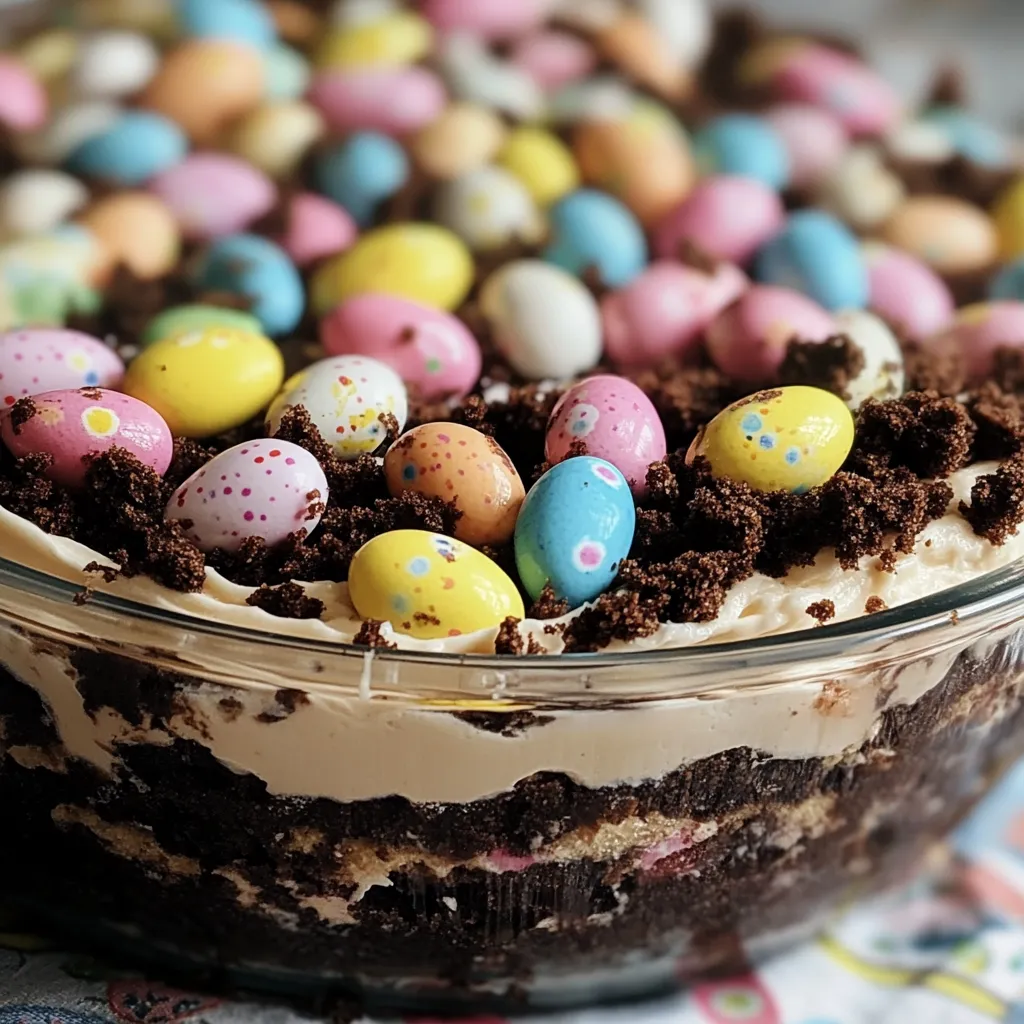
This Easter dirt cake transforms ordinary ingredients into a magical spring treat that'll grab attention and taste buds alike. The combo of smooth pudding and crushed chocolate cookies makes a perfect backdrop for a fun Easter display with bright candies. Every bite gives you that awesome creamy-crunchy mix, and the festive look will be the star at any spring party. The best part? It's super quick to put together but looks like you slaved away for hours in the kitchen.
The first time I whipped this up was for my daughter's spring birthday many years back, and I can't forget how the kids' eyes got huge when I brought it out. What really caught me off guard was watching the adults crowd around it just as eagerly, grabbing spoonfuls even after the kids ran off to play. Even my brother, who usually passes on desserts, came back for thirds and wanted my recipe. These days, our family turns it into a contest for who can make the coolest Easter scene on top – my nephew took the prize last year with an amazing Peeps parade that had jelly beans as the crowd watching.
Tasty Basics
- Chocolate sandwich cookies: Make up the "dirt" for both bottom and top layers; standard Oreos do the trick, but going with chocolate cream ones pumps up the chocolate taste
- Cream cheese: Adds a zesty richness that cuts through the sweetness; go with full-fat for the smoothest result, though light versions can work too
- Instant vanilla pudding: Creates the silky core of the filling with its smooth feel and light vanilla flavor; try French vanilla if you want something more noticeable
- Milk: Brings the pudding mix to life and gets the texture just right; whole milk makes it richest, but any kind works fine
- Whipped topping: Gives the mixture that cloud-like feel; real whipped cream can work but won't stay fluffy as long as the store-bought stuff
- Powdered sugar: Adds sweetness to the cream cheese part without any gritty texture; give it a quick sift for the smoothest mix
- Butter: Makes the filling extra rich and helps it firm up in the fridge; pick unsalted to keep things purely sweet
- Easter candies: Turn this into a fun display that makes everyone smile; pick candies with different colors and shapes
- Shredded coconut: Becomes realistic "grass" when dyed; the sweetened kind holds color better
- Green food coloring: Makes the spring grass that brings your Easter scene to life; gel colors look brighter than liquid ones
Putting It Together
- Cookie prep:
- Grab about 24 chocolate sandwich cookies and toss them in your food processor with the metal blade. Give them several quick pulses, then run it until you've got fine crumbs that look just like dirt. No processor? No problem. Stick cookies in a sturdy ziplock bag and smash them with a rolling pin. Set aside about ½ cup of crumbs for the top.
- Cream cheese mix:
- In a big bowl, mix 8 ounces of room-temp cream cheese with ¼ cup soft butter and 1 cup powdered sugar. Beat everything with your mixer on medium for 2-3 minutes until it's super smooth and fluffy. Scrape the bowl halfway through. You want it nice and pale with zero lumps for the best texture.
- Pudding blend:
- Take a medium bowl and whisk two 3.4-ounce packs of instant vanilla pudding with 3 cups cold milk. Whisk hard by hand for about 2 minutes until it starts thickening but still pours easily. Don't wait too long because it'll keep getting thicker.
- Mixing it all:
- Scoop the pudding into your cream cheese mix. Use a rubber spatula to gently fold them together with figure-eight movements until barely mixed. Then add an 8-ounce tub of whipped topping and keep folding carefully until you can't see any white streaks. Don't overmix or you'll flatten all the air out.
- Bottom layer:
- Pick a see-through glass 9×13-inch dish so everyone can admire the layers. Spread about half the cookie crumbs across the bottom and lightly press them down. The dark crumbs against clear glass instantly give that cool "dirt" look.
- Cream layer:
- Carefully spoon your cream cheese pudding mix over the cookie crumbs. Use a flat spatula to spread it evenly, making sure to get right into the corners. This smooth layer will be the "ground" for your Easter decorations.
- Top dirt:
- Sprinkle your saved cookie crumbs over some parts of the cream, but leave gaps for "grassy" areas. This makes your scene more interesting and gives you different zones for decorating.
- Making grass:
- If you want grass, put 1½ cups shredded coconut in a ziplock with 6-8 drops of green food coloring. Seal it and squish it around until all the coconut turns spring green. Sprinkle this "grass" over your open areas, making small mounds so it looks more real.
- Easter scene:
- Now for the fun part! Arrange Easter candies all over to create your scene. Nestle chocolate eggs into the "dirt," stand Peeps in the "grass," and scatter jelly beans for pops of color. Add chocolate bunnies, pastel candies, or edible flowers to make it extra special.
- Finishing touch:
- Cover your masterpiece carefully with plastic wrap, trying not to touch the decorations. Pop it in the fridge for at least 2 hours or overnight so the flavors can mingle and everything sets up properly. This cooling time is super important to get that perfect sliceable texture.
 Save
Save
I found out the hard way how important soft cream cheese is when I rushed making this for a last-minute get-together. The bumpy filling was so disappointing compared to the velvety version I usually make. My grandma showed me her trick of putting wrapped cream cheese on a warm coffee mug for about 15 minutes to get it perfectly soft without melting it. When my kids were little, they loved decorating the top, and I learned that giving each kid their own area to design not only stopped arguments but led to some amazingly creative scenes that got more elaborate every year.
Fun Serving Ideas
Make your holiday gathering extra special with smart serving strategies for this playful dessert. Try creating a build-your-own station with the base layers ready to go and bowls of different Easter candies for guests to decorate their own portions. Kids go crazy for this hands-on approach, and adults love getting in touch with their creative side too. For a fancier look, serve in individual clear glass cups or mason jars with visible vertical layers that look stunning from every angle. This single-serving method shows off all the layers beautifully and makes serving way less messy. If you're taking this to a potluck or family dinner, carry it in a cooler with ice packs to keep it firm, and maybe wait to add the most delicate decorations until you arrive so they stay perfect.
Year-Round Versions
This flexible dessert works great beyond Easter with a few creative tweaks. For summer parties, swap the Easter candies for fresh berries, pretty edible flowers, and butterfly cookies scattered among the "grass" and "dirt." The fresh fruit brings a lovely brightness that pairs perfectly with the creamy filling. At Halloween, turn it into a creepy graveyard using the same base but decorated with cookie tombstones, gummy worms, and candy pumpkins spread throughout the crumbled cookie "soil." Add black food coloring to some cookie crumbs for an extra spooky touch. For Christmas, try crushed peppermint candies, tiny candy canes, and chocolate Santas arranged in a winter wonderland. You can replace the green grass with white coconut "snow" drifts for a holiday twist.
Keeping It Fresh
Keep this showstopper dessert at its best with proper storage. Cover the dish with plastic wrap, pressing it gently against any exposed filling but tenting it over decorations so they don't get smudged. Keep it in the fridge for up to three days, though it's definitely best within the first 48 hours before the cookies get too soft. If you want to prep ahead, make the base layers and refrigerate them covered for up to two days, then add your decorations right before serving. This way, you'll keep that perfect contrast between creamy filling and crunchy cookies. For outdoor serving, set the dish in a larger pan filled with ice to keep it cold, and keep it out of direct sunlight that could melt both the filling and chocolate decorations.
After bringing this Easter dirt cake to family gatherings for years, I've noticed how it connects people of all ages in such a special way. There's something about these familiar flavors and fun presentation that really brings everyone together – grandparents thinking back to childhood treats, parents loving how easy it is to make, and kids totally fascinated by the creative scene. What really makes this dessert stand out isn't just how good it tastes (though that creamy-crunchy combo is seriously delicious), but all the conversations and smiles it creates. I always get a kick out of watching someone's face change from "this looks so cute" to "wow, this is actually amazing" after their first bite. In our family, it's gone from just another holiday dessert to a tradition we all look forward to that marks the beginning of spring with something sweet and creative.
 Save
Save
Recipe FAQs
- → Can I prepare this ahead of time?
- Sure! Make it a day before and keep it chilled until serving.
- → What replaces Cool Whip in this?
- You can swap it with 3 cups of whipped cream stabilized with gelatin or heavy cream mixed with powdered sugar.
- → How do I skip the coconut topping?
- Leave it out completely or swap it for green sprinkles or shaved white chocolate colored green.
- → Is chocolate pudding a good substitute?
- Absolutely! It makes the dessert even more chocolatey to complement the 'dirt' layers.
- → What's the best way to store leftovers?
- Cover with plastic wrap and refrigerate for up to 3 days. The cookies will get softer, but it’ll still taste great.