
 Save
Save
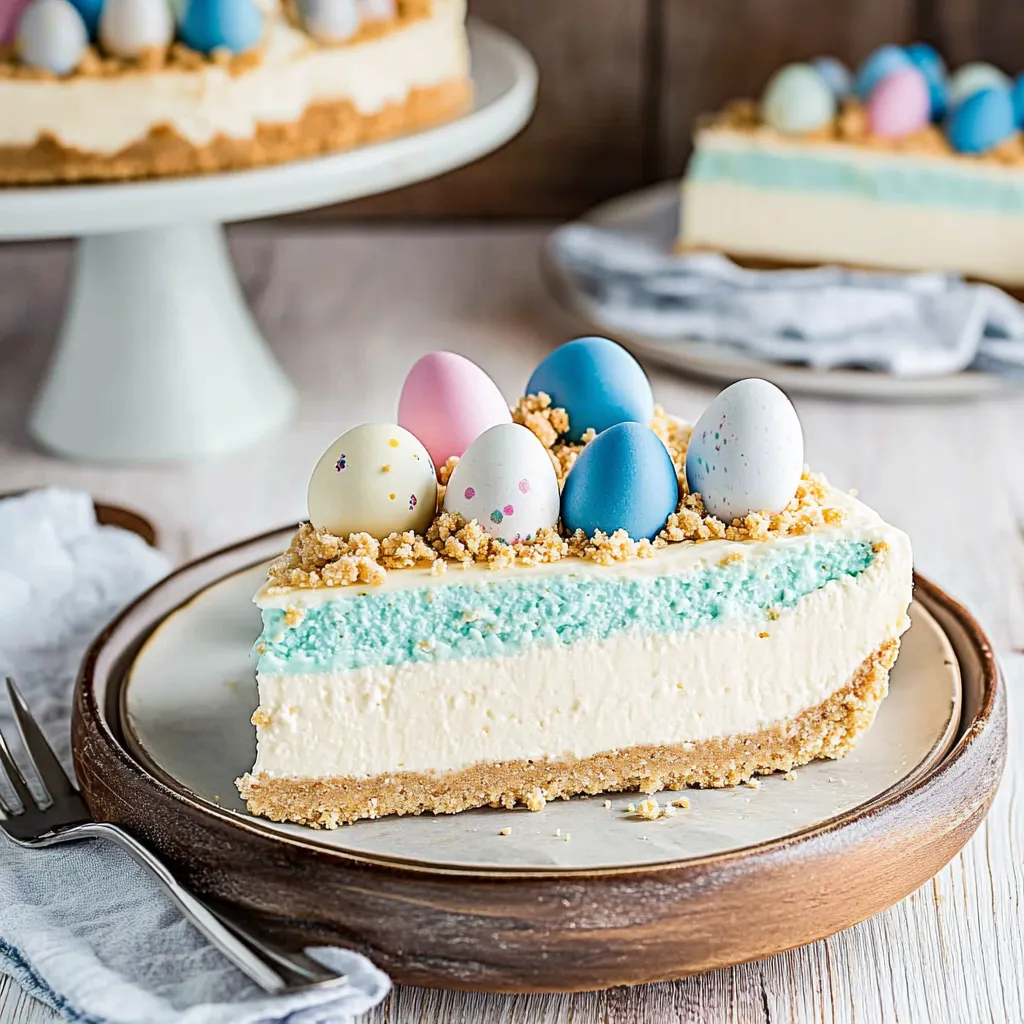
Every Easter for the last few years, I've whipped up this Easter Egg Cheesecake for our family dinner, and now everyone starts asking about it way before the holiday arrives! The combo of those sweet pastel malted eggs against the soft blue frosting totally says springtime and creates a gorgeous holiday treat with barely any work.
Last year my aunt, who normally handles all the desserts at family get-togethers, actually wanted my recipe. That's when I knew I had a real hit on my hands!
Ingredients You'll Want
- Graham cracker crumbs: Grab them already crushed or smash whole crackers in your food processor.
- Robin's egg malt balls: These speckled, candy-coated chocolate malted milk eggs really steal the show.
- Cream cheese: Go for the full-fat blocks, not the spreadable stuff in tubs, for the best results.
- Sweetened condensed milk: This brings sweetness and helps everything firm up without baking.
- Cool Whip: This gives you that airy, light texture. You can use homemade whipped cream too if you stiffen it up.
- Lemon juice: Just a tiny bit adds freshness without making it taste like lemon.
- Blue food coloring: Try to use gel colors if you can find them – they'll give you that pretty robin's egg shade without thinning out your filling.
 Save
Save
My Preparation Method
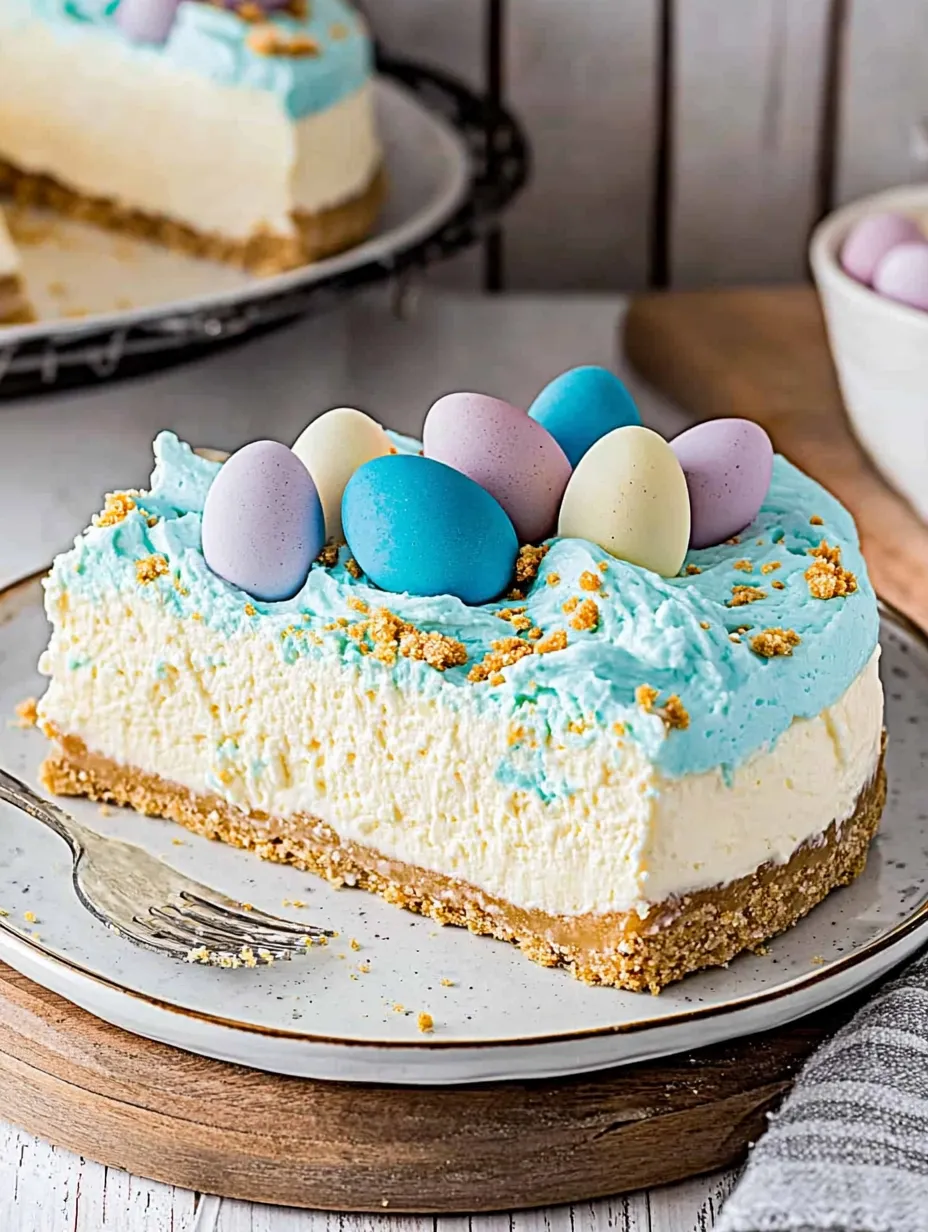
Creating The BaseI've learned that using the flat bottom of a measuring cup to push down the graham cracker mixture gives you the smoothest crust with tidy edges. Letting it chill while you mix the filling helps it stay together better.
Creating The LayersThe secret to those pretty layers is splitting the filling and only adding blue color to half of it. I put down the white part first, then gently spread the blue mixture on top. A small spatula works wonders for getting everything nice and flat.
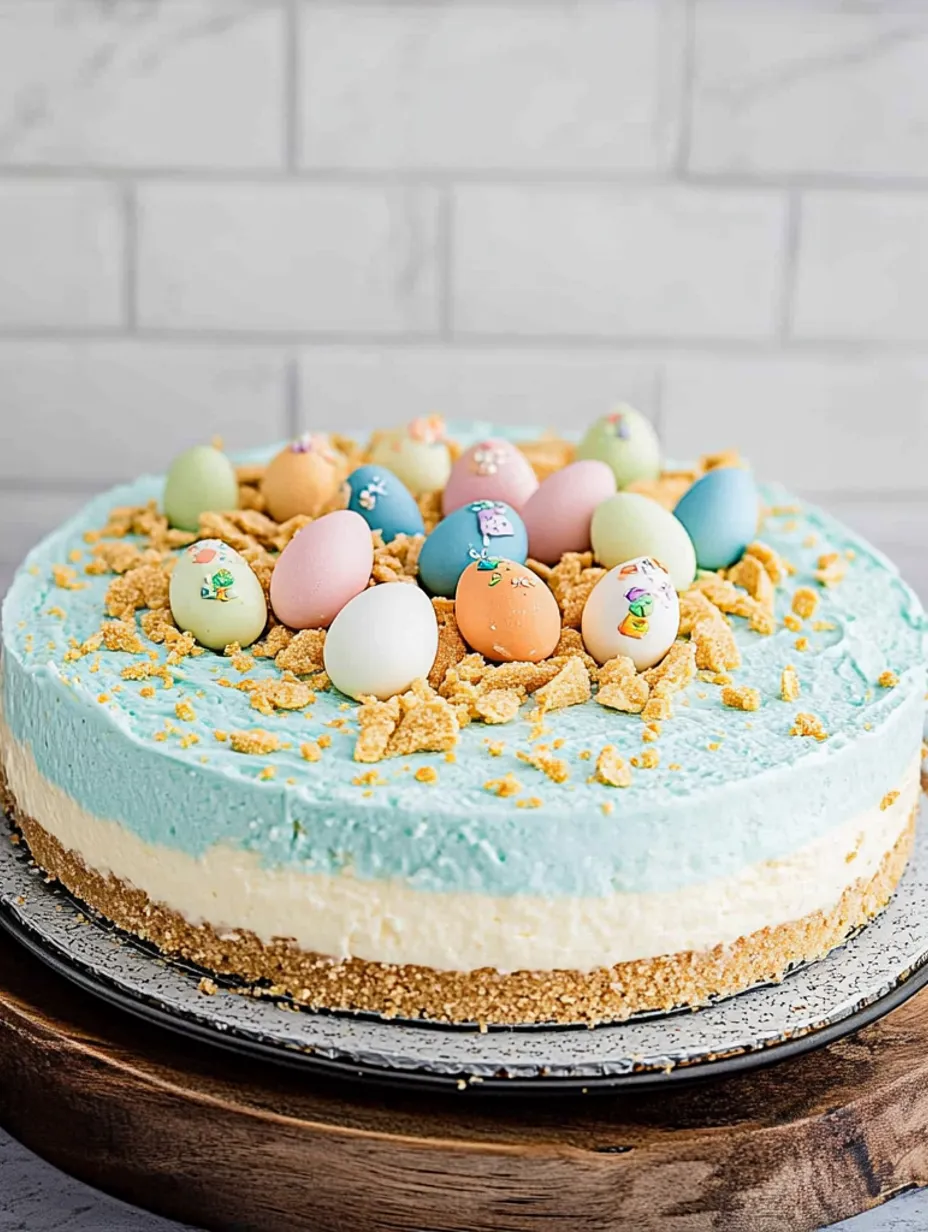
Getting That Speckled LookLightly dusting with cocoa powder before adding the eggs creates that authentic speckled robin's egg appearance. I use a tiny strainer to get just the right amount spread evenly across the top.
Placing The CandyI start by putting whole eggs around the outside first, then fill the middle with broken pieces. Using both whole and crushed eggs looks more interesting and makes serving much easier.
I stumbled on this recipe a while back when I needed something that wouldn't take up oven space during our busy Easter cooking. While the no-bake feature first caught my eye, it's the beautiful look that keeps me coming back to it every spring!
Ways To Serve It
This dessert looks amazing as the main attraction on your Easter dessert table. Sometimes I add fresh mint sprigs around the plate for extra color. For a more casual setup, you can do single servings in small cups or jars – just layer everything and top each with a candy egg or two.
Change It Up
Want something different? Try a chocolate cookie base instead of graham crackers for extra chocolatey goodness. Add a splash of vanilla to the filling for more flavor depth. For a fancier version, mix some lemon zest into your filling. You could even fold some raspberry jam into the white layer for a fruity kick.
Keeping It Fresh
This cheesecake stays good in your fridge for up to 3 days. I usually make mine the day before we eat it, which gives all the flavors time to blend together and lets the filling set completely. Got leftovers? Just cover them loosely with plastic wrap so you don't mess up the pretty top.
 Save
Save
Expert Advice
- Add your blue food coloring bit by bit until you nail that perfect robin's egg blue color
- Make sure your white layer is totally flat before you add the blue to avoid any mixing between layers
- Before you open the springform pan, run a thin knife around the edges for a clean release
This Easter Egg Cheesecake has become such a staple in our family gatherings that I think they'd all be pretty upset if I showed up without it! There's something really rewarding about making a dessert that looks super fancy but doesn't take hours of work. And let's be honest, everyone loves cutting into those beautiful colored layers!
Recipe FAQs
- → Can this cake be made the day before?
- Totally! It's even better when made the night before. Cover it lightly with plastic wrap and chill it overnight so it fully sets up.
- → What works instead of Cool Whip?
- Swap it with 3 cups of heavy cream whipped with 1/3 cup powdered sugar until peaks form. Gently fold this into the mix.
- → Can I freeze it?
- You can freeze it, but leave off the candy topping since it may bleed when thawed. Add the candy eggs after it's thawed in the fridge.
- → What if I can't find candy eggs?
- Use other pastel sweets like mini chocolate eggs, colorful jelly beans, or pastel M&Ms instead.
- → Why is lemon juice added?
- A splash of lemon juice cuts the sweetness, adding a little tang that makes it taste like baked cheesecake, but easier!
Springtime creamy treat
A vibrant no-bake cheesecake with colorful layers and candy egg decoration, perfect for spring or Easter celebrations.
Ingredients
→ Crust Base
→ Cheesecake Filling
→ Toppings
Steps
Cut a piece of parchment to fit the bottom of a 9-inch springform pan. Set it aside for now.
Mix graham cracker crumbs, melted butter, and sugar in a large mixing bowl. Use a fork to blend everything evenly.
Move the crumb mixture to the prepared pan. Press it down well and into a flat, even layer. Refrigerate to firm up while you start the filling.
Using a mixer, beat the cream cheese, condensed milk, vanilla, and lemon juice for 3-4 minutes till it's creamy and smooth. Toss in the Cool Whip and gently blend with a spatula until it’s all combined.
Take the crust out of the fridge and pour half of your cheesecake mixture onto it. Smooth the surface using a spatula.
Drop the blue food coloring into the remaining filling. Blend well with a hand mixer till the color is even. Spread this over the white base, keeping it slightly uneven for a layered look.
Place a portion of the Robin’s Eggs candy into a plastic bag. Lightly break them into chunks using a rolling pin or mallet. Keep both crushed and uncrushed pieces aside.
Using a fork, lightly sprinkle cocoa powder on top of your cheesecake to get an effect that looks like robin’s egg speckles.
Start putting whole Robin’s Eggs candies in the middle of the dessert and work outward. Use the crushed pieces to fill any gaps and add some texture.
Put the dessert in the fridge for 4-6 hours to set. If leaving longer or overnight, cover loosely with plastic wrap or foil. The cooler it gets, the firmer it will finish.
Pop the outer rim off your pan and slice with a sharp knife for clean, neat edges before serving.
Notes
- For a richer texture, choose full-fat cream cheese.
- If you’re out of Cool Whip, mix up some fresh whipped cream and a little powdered sugar as a swap.
- Making it a day ahead gives the best consistency.
- When freezing this, wrap in both plastic and foil. Just be aware the candy may change color once defrosted.
Required Tools
- Springform pan, 9 inches
- Paper for lining (parchment)
- Bowls for mixing ingredients
- Hand or electric mixer
- Flexible spatula
- Plastic storage bag (ziplock)
- Mallet or rolling pin
Allergy Information
Check each ingredient for potential allergens and consult a healthcare professional if needed.
- Dairy (butter, cream cheese, condensed milk, Cool Whip)
- Gluten/wheat (graham cracker crumbs)
- Potential eggs (depending on Cool Whip brand)
Nutritional Facts (per serving)
These details are provided for informational purposes and aren't a substitute for medical advice.
- Calories: 445
- Fats: 30 g
- Carbohydrates: 35 g
- Proteins: 11 g