
 Save
Save
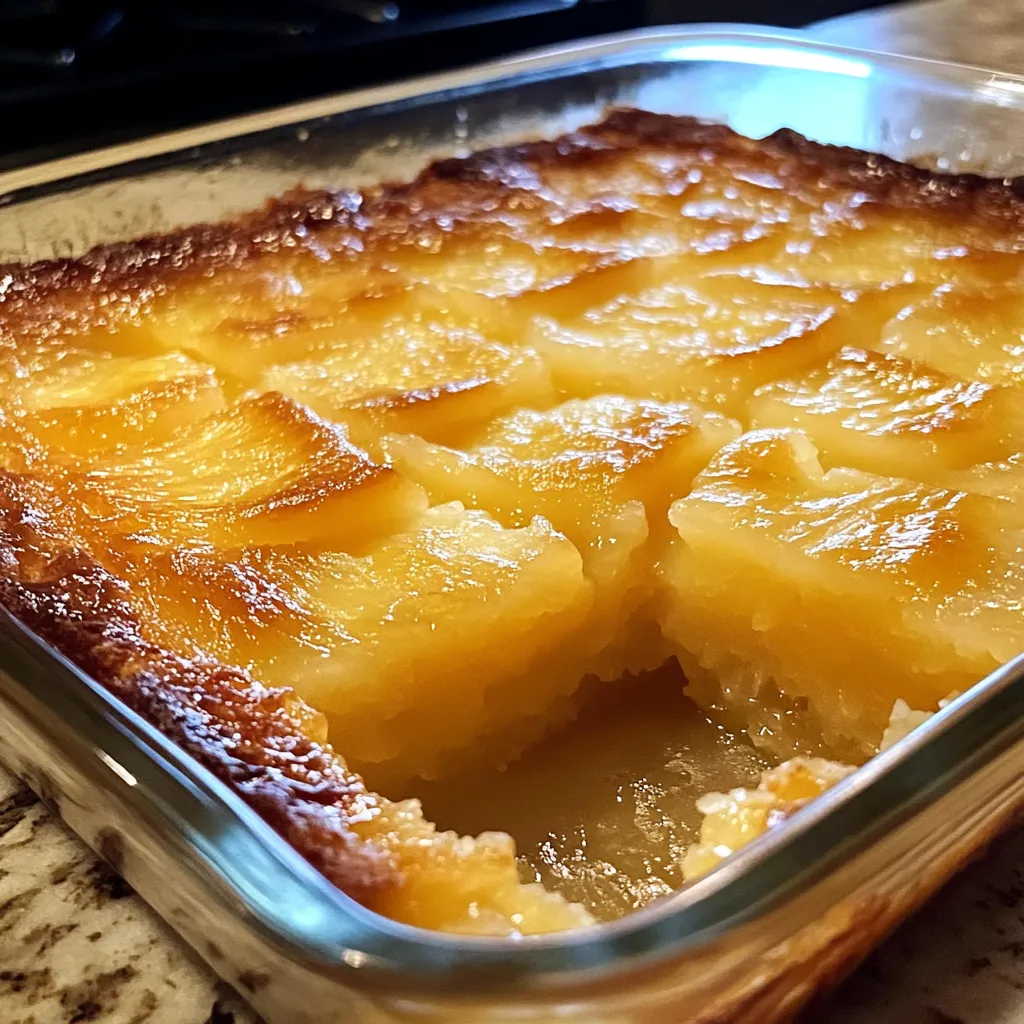
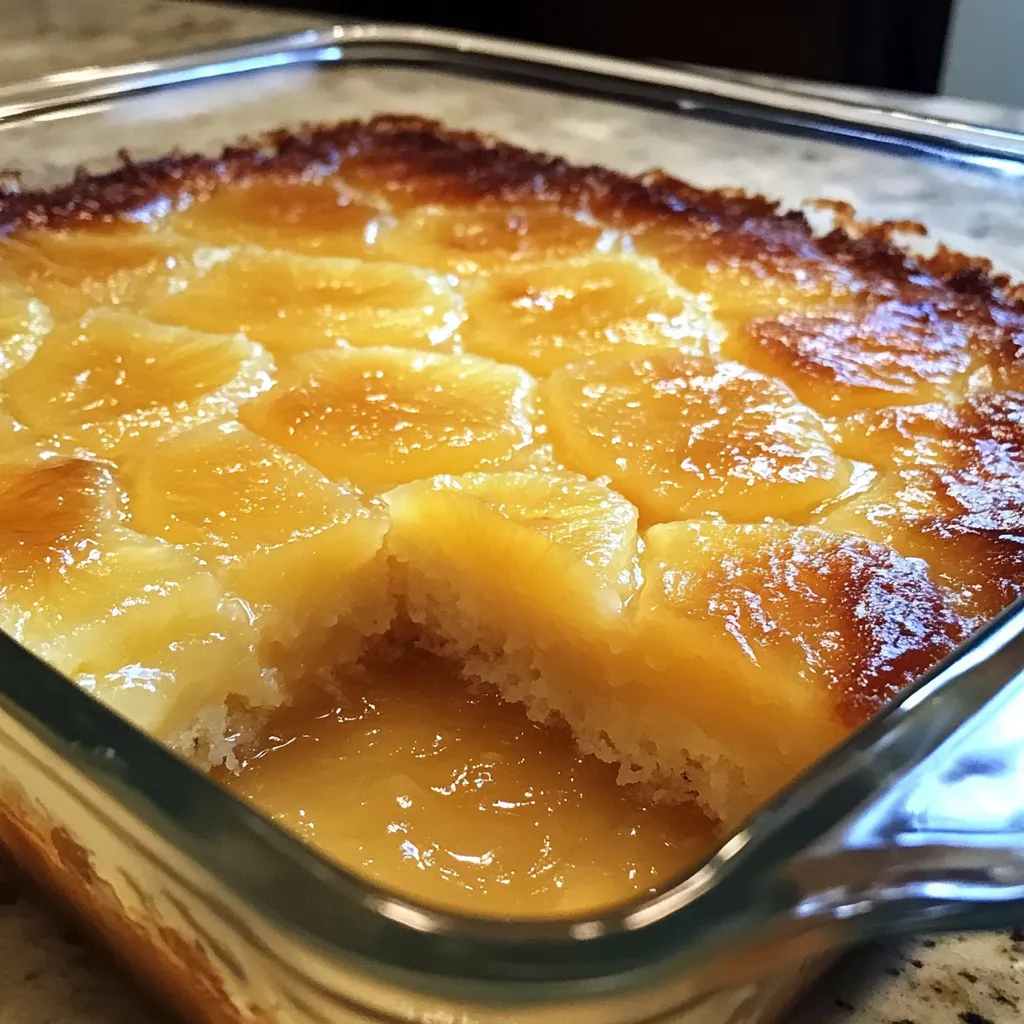
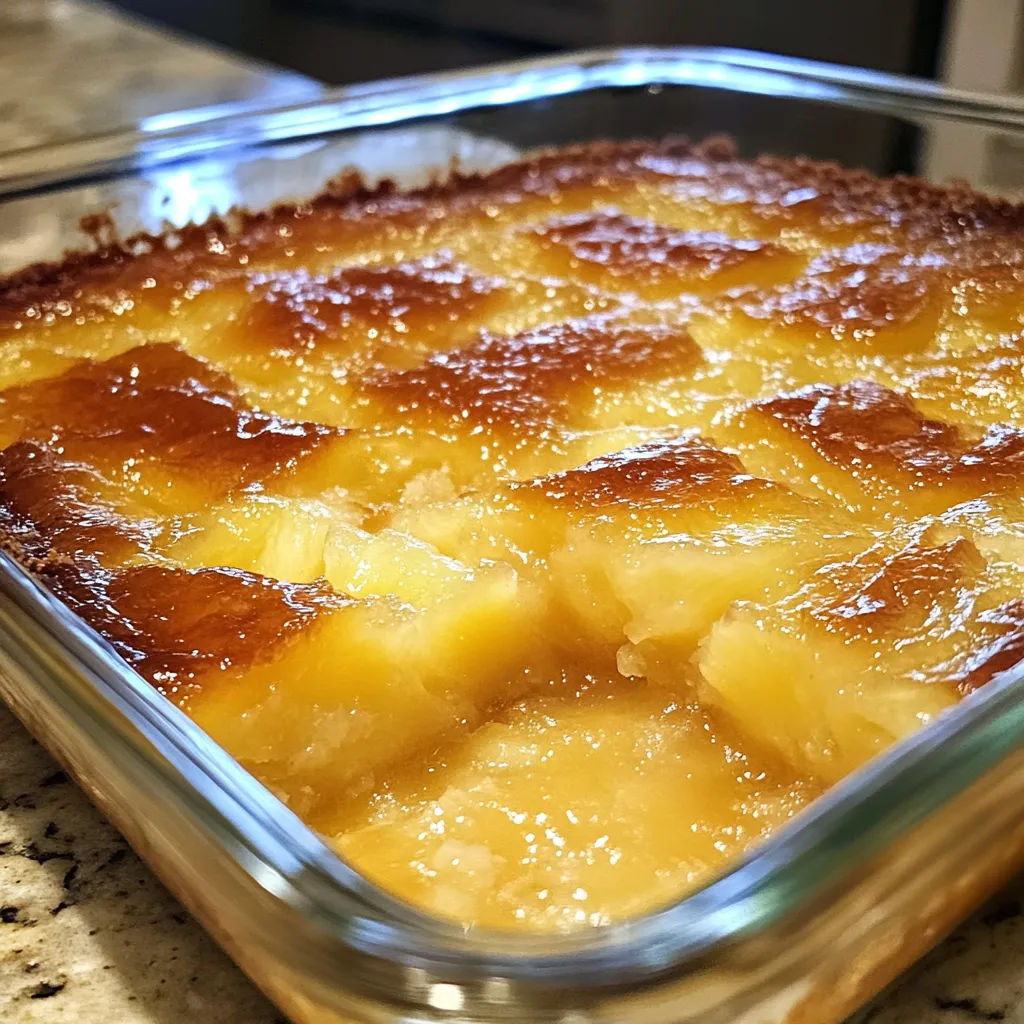
This incredibly juicy pineapple cake bursts with sunshine flavor in every bite. You'll love how the moist crumb holds little pockets of tropical sweetness throughout, while the light pineapple glaze soaks into the warm cake, making an unforgettable treat that'll whisk you away to a beachy paradise with each tasty mouthful.
I stumbled upon this gem during a seaside getaway when our vacation kitchen had basic baking tools but plenty of pantry items. What started as a thrown-together dessert using canned pineapple has turned into the most asked-for sweet treat at family get-togethers. There's something wonderful about how those tangy-sweet bits of fruit spread throughout the mix—when you cut a slice, you'll see golden fruit pockets bursting with island flavor. Even my picky father-in-law, who always says he doesn't like fruit in his desserts, asks for this cake whenever he stops by.
Sunny Ingredient Breakdown
- All-Purpose Flour: Gives your cake the ideal foundation while staying soft from the fruit's juices
- Baking Powder: Adds just enough rise for that perfect texture that isn't too heavy or fluffy
- Unsalted Butter: Brings rich taste and helps create that soft, tender feel when you take a bite
- Granulated Sugar: Cuts through the pineapple's tang while bringing out its sweet tropical notes
- Large Eggs: Hold everything together and add richness to make your cake sturdy but soft
- Vanilla Extract: Makes the pineapple flavor even better with its warm, sweet background notes
- Sour Cream: Keeps everything wonderfully moist and adds a tiny bit of tang
- Crushed Pineapple: Fills the cake with juicy bits and sweet tropical pockets throughout
- Powdered Sugar: Creates that perfect topping that melts into the warm cake for extra moisture
- Pineapple Juice: Makes the tropical flavor stronger in the glaze with natural sweetness
Baking Your Island Escape
- Set Up Your Space:
- Get your oven going at 350°F and carefully grease and flour a loaf pan. This prep work makes sure your cake comes out cleanly after baking, keeping its shape intact.
- Mix Dry Stuff:
- Stir flour, baking powder, and salt together in a bowl. Getting these mixed evenly means your cake will have the same texture from end to end.
- Get Butter Ready:
- Beat your soft butter with sugar until it's fluffy and pale, about 3-4 minutes. This longer mixing puts air into your batter and breaks down sugar crystals for a smoother cake.
- Build Your Base:
- Add eggs one by one, mixing well after each, then stir in vanilla. Adding eggs slowly keeps everything well mixed and stops the batter from breaking.
- Go Back and Forth:
- Add your flour mix and sour cream in turns, starting and ending with flour. This way prevents overmixing but makes sure everything gets blended properly.
- Add The Main Attraction:
- Carefully fold in well-drained crushed pineapple with a spatula. This gentle touch keeps air bubbles in your mix while spreading fruit evenly throughout.
- Bake Until Done:
- Pour everything into your prepared pan and smooth the top. Bake for 50-60 minutes until a toothpick comes out mostly clean with maybe a few damp crumbs but no wet batter.
- Finish It Off:
- Let your cake sit in the pan for 10 minutes before moving to a cooling rack. While still warm, mix powdered sugar with pineapple juice until smooth, then drizzle over top. The warm cake will soak up some glaze, making it extra moist and flavorful.
 Save
Save
My family can't get enough of this cake during the holidays when its bright flavor offers a nice break from heavy Christmas desserts. My daughter now tosses in some shredded coconut to make it even more tropical, which works amazingly with the pineapple. For birthdays and anniversaries, I sometimes put a splash of rum extract in the glaze, giving it a hint of piña colada that always gets compliments.
The recipe came from my grandma's collection, though she called it "Sunshine Cake" and always used fresh pineapple when she could find it. I've kept up her tradition of serving thin slices with afternoon tea, but honestly, the cake rarely makes it past day one in our house.
Perfect Serving Suggestions
This fruity cake really shines when you pair it with flavors that bring out its tropical goodness. Try serving warm slices with a scoop of vanilla ice cream that gets slightly melty against the cake, making a creamy contrast to the bright pineapple. For morning get-togethers, enjoy it with fresh coffee or coconut tea to keep the tropical theme going. In summer, add some fresh berries and mint leaves for a pretty, refreshing touch. When hosting dinner guests, make it fancy by topping each piece with a dollop of rum-flavored whipped cream and some caramelized pineapple chunks.
Tasty Twists
You can easily change up this adaptable cake while keeping its moist, tender texture. Make a coconut version by swapping 1/4 cup of flour with shredded coconut and adding coconut extract to the topping. For a zesty spin, mix in 1 tablespoon of lime zest to the batter and use half lime juice in the glaze instead of all pineapple juice. If you like warm spices, try adding 1/2 teaspoon of cardamom or ginger to your dry ingredients for an unexpected kick. For fancy occasions, mix in 1/3 cup of chopped macadamia nuts for some crunch and authentic tropical flavor.
Keeping It Fresh
Keep your pineapple cake tasting amazing with these storage tricks. Store it at room temperature in an airtight container or wrapped well in plastic for up to three days—it'll actually taste better during this time as the pineapple flavor spreads throughout. If you need it to last longer, stick it in the fridge for up to a week, but let slices come back to room temp before eating to get that soft texture back. This cake freezes really well for up to three months if you wrap it tight in plastic and then foil; thaw in the fridge overnight and warm up before serving. Think about slicing it before freezing so you can grab single pieces whenever you want.
I realized how powerful this cake can be during a tense family gathering when everyone was on edge. As we passed around slices of this bright, sunny treat, I watched the conversations soften and smiles appear. Something about its humble charm and sweet tropical flavor seemed to take everyone to a happier, more relaxed place. Now, whenever things get rocky between family members, this is my go-to cake. There's a good reason we call certain foods "comfort food"—this pineapple cake has an amazing way of lifting spirits and creating moments of shared happiness around the table. The simple joy of biting into a slice still warm from the oven, with that perfect balance of buttery cake and sweet-tart pineapple, remains one of the easiest yet most satisfying pleasures in life.
 Save
Save
Recipe FAQs
- → Is canned pineapple okay to use?
- Definitely! Crushed canned pineapple works great. Drain it really well to avoid too much moisture, and you can keep the juice for the glaze.
- → How can I check if the cake's baked?
- Stick a toothpick into the middle of the cake. If it’s mostly clean or has a few crumbs (not wet batter), you’re good to go! Also, the top should feel springy and look golden.
- → Can this cake be frozen?
- Yep! Wrap the unglazed, cooled cake in cling film and then foil. Freeze for up to 3 months. When ready, let it thaw fully before glazing.
- → What if I don’t have sour cream?
- Greek yogurt is a great swap for sour cream. Similar moisture, tang, and a little less fat—it works like a charm.
- → Can I toss in nuts?
- Of course! Chop up about 1/2 cup of walnuts or pecans and fold them in with the pineapple. Toasted coconut is also a fun way to mix it up!