
 Save
Save
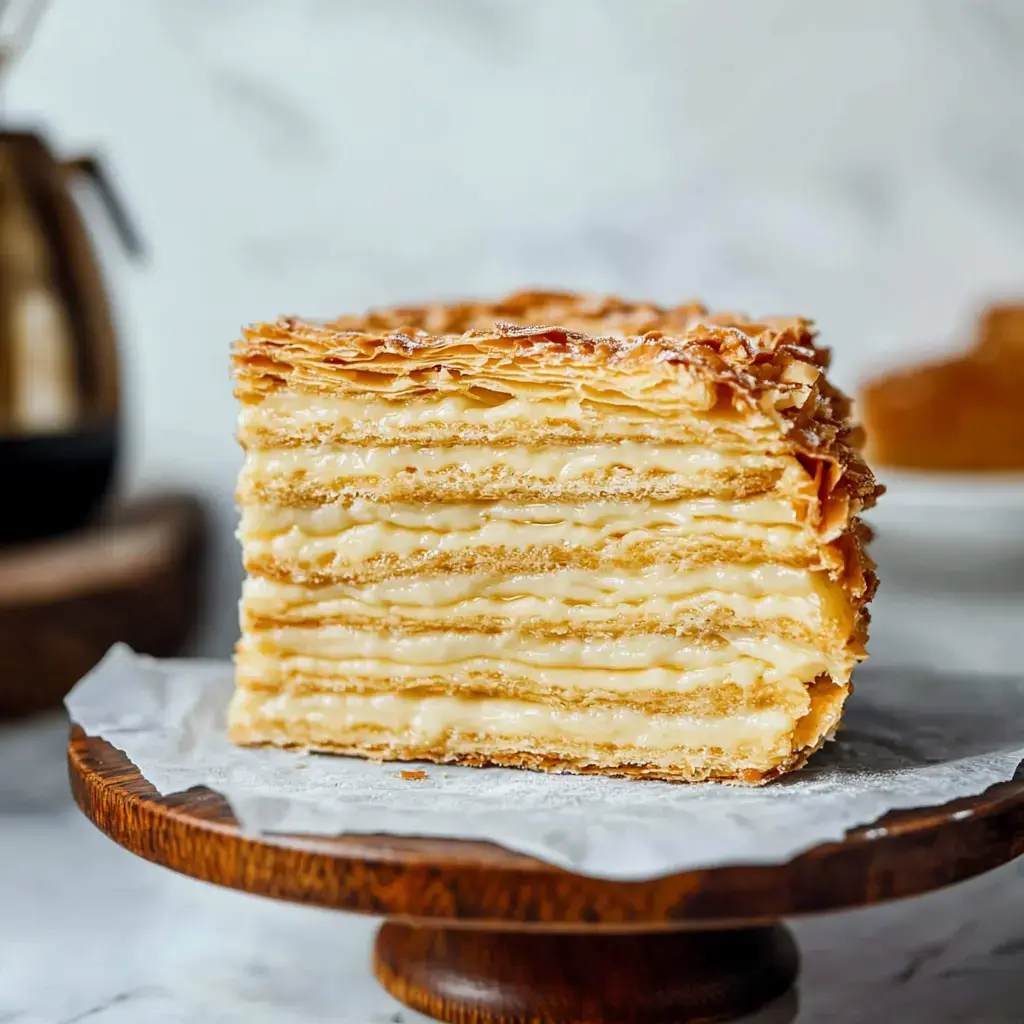
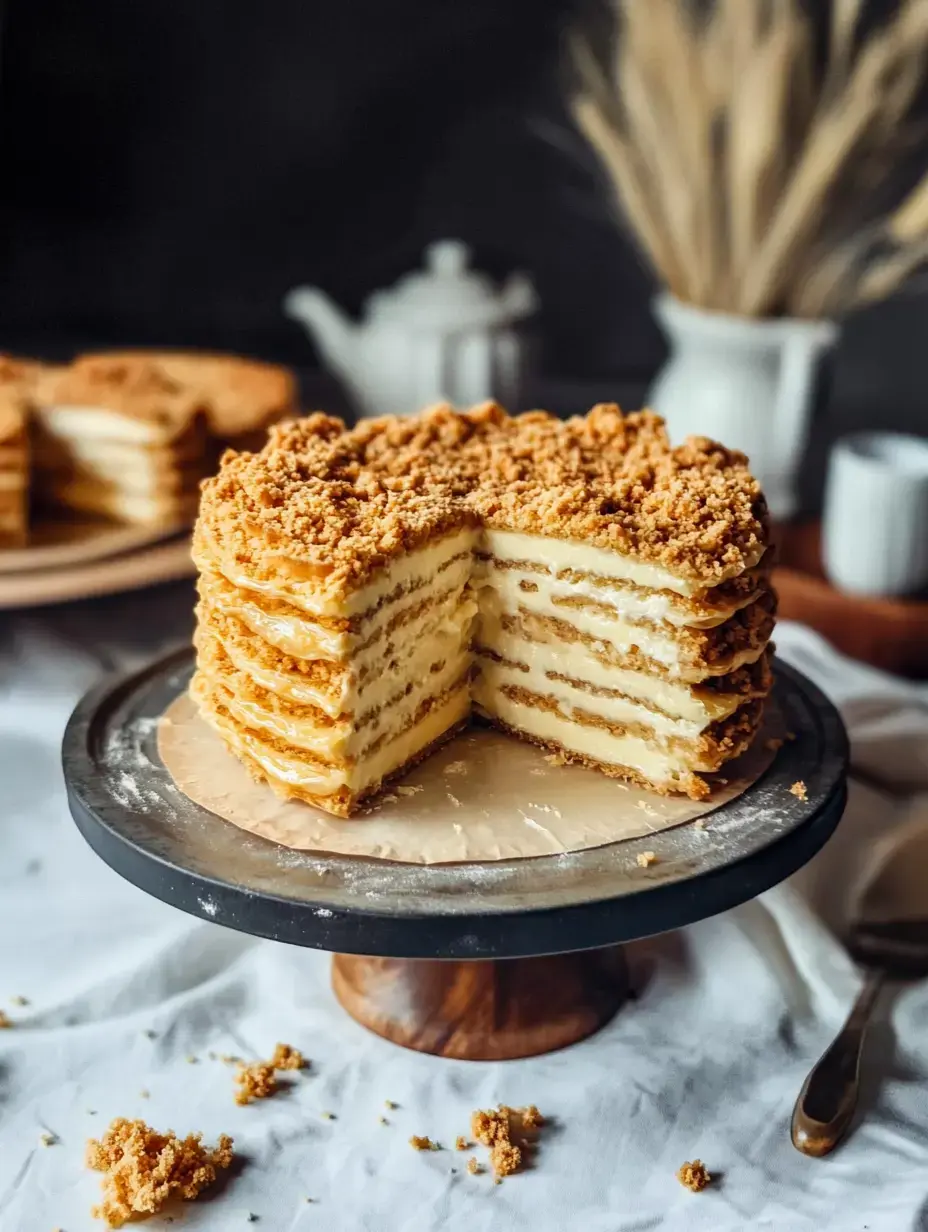
Napoleon Cake is a masterpiece of delicate pastry layers and rich cream filling that creates an unforgettable texture in every bite. Here are essential tips for crafting this classic dessert that has been perfected through years of traditional baking.
Essential Resting Time
Allow the assembled cake to rest overnight in the refrigerator. This crucial step lets the cream fully absorb into the pastry layers, developing a harmonious blend of flavors.
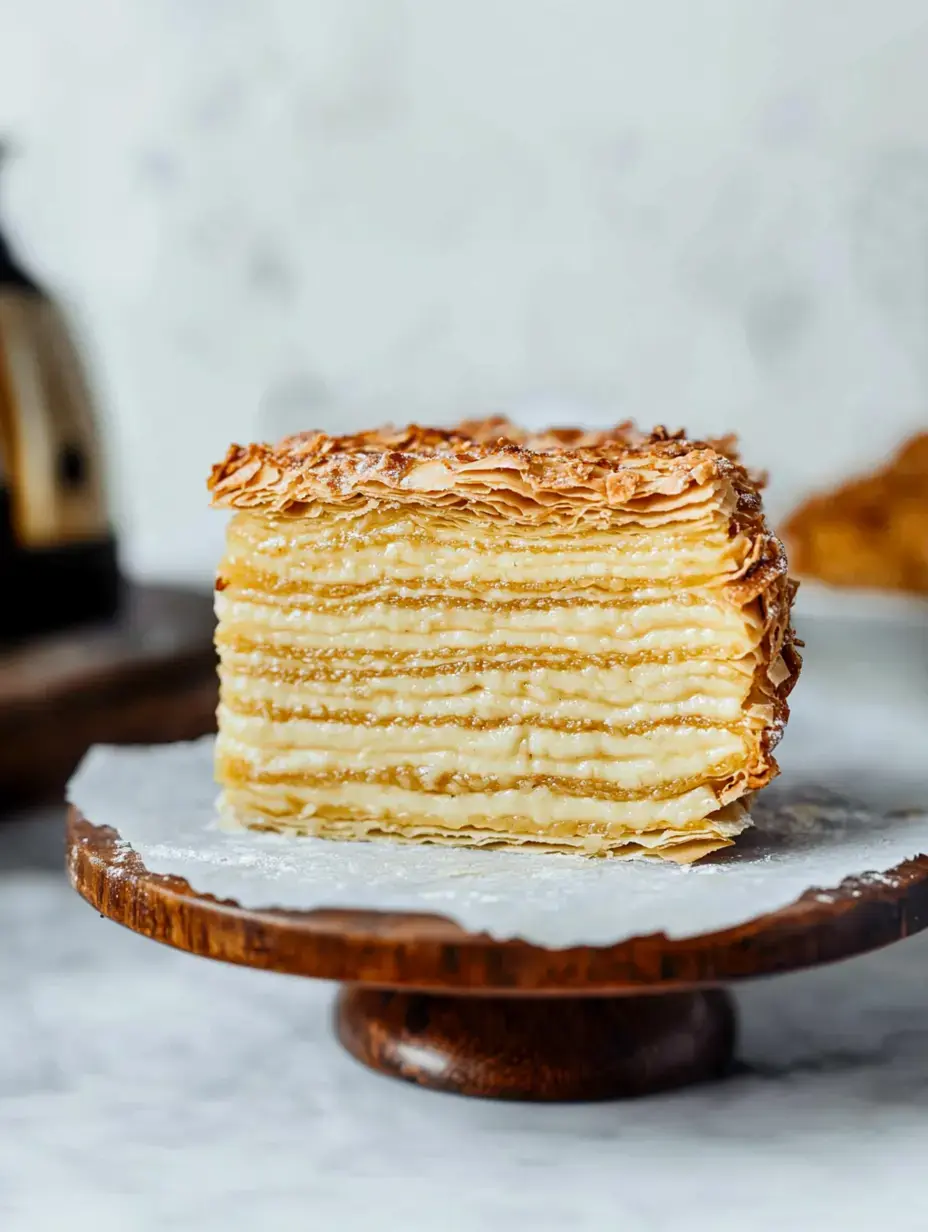
Consistent Layer Preparation
Roll each pastry layer to a uniform thickness using a measured guide. This attention to detail ensures even baking and a beautifully balanced final result.
Balanced Sweetness
Carefully calibrate the sweetness of the cream filling. The right balance highlights both the buttery pastry and rich cream components.
Advanced Preparation
This dessert improves with time, making it ideal for advance preparation. The flavors continue developing, perfect for special occasions.
 Save
Save
Chocolate Variation
Consider incorporating dark chocolate ganache between layers for an indulgent twist on the classic recipe.
Finishing Touches
Garnish with freshly whipped cream and a light honey drizzle to enhance both visual appeal and flavor complexity.
Alternative Ingredients
Quality gluten-free flour blends can be substituted successfully when needed. Select premium ingredients for optimal results.
Filling Variations
Experiment with mascarpone-based filling for a different textural experience while maintaining classic richness.
Decorative Elements
Garnish with seasonal edible flowers and candied citrus for an elegant presentation suitable for special occasions.
 Save
Save
Beverage Pairings
Serve alongside prosecco or dessert wine to complement the vanilla and butter notes in the pastry.
Layer Options
Traditional recipes feature multiple thin layers, but fewer layers create an equally delicious simplified version.
Cultural Heritage
This beloved dessert combines Russian baking tradition with French culinary influence, creating a truly international delicacy.
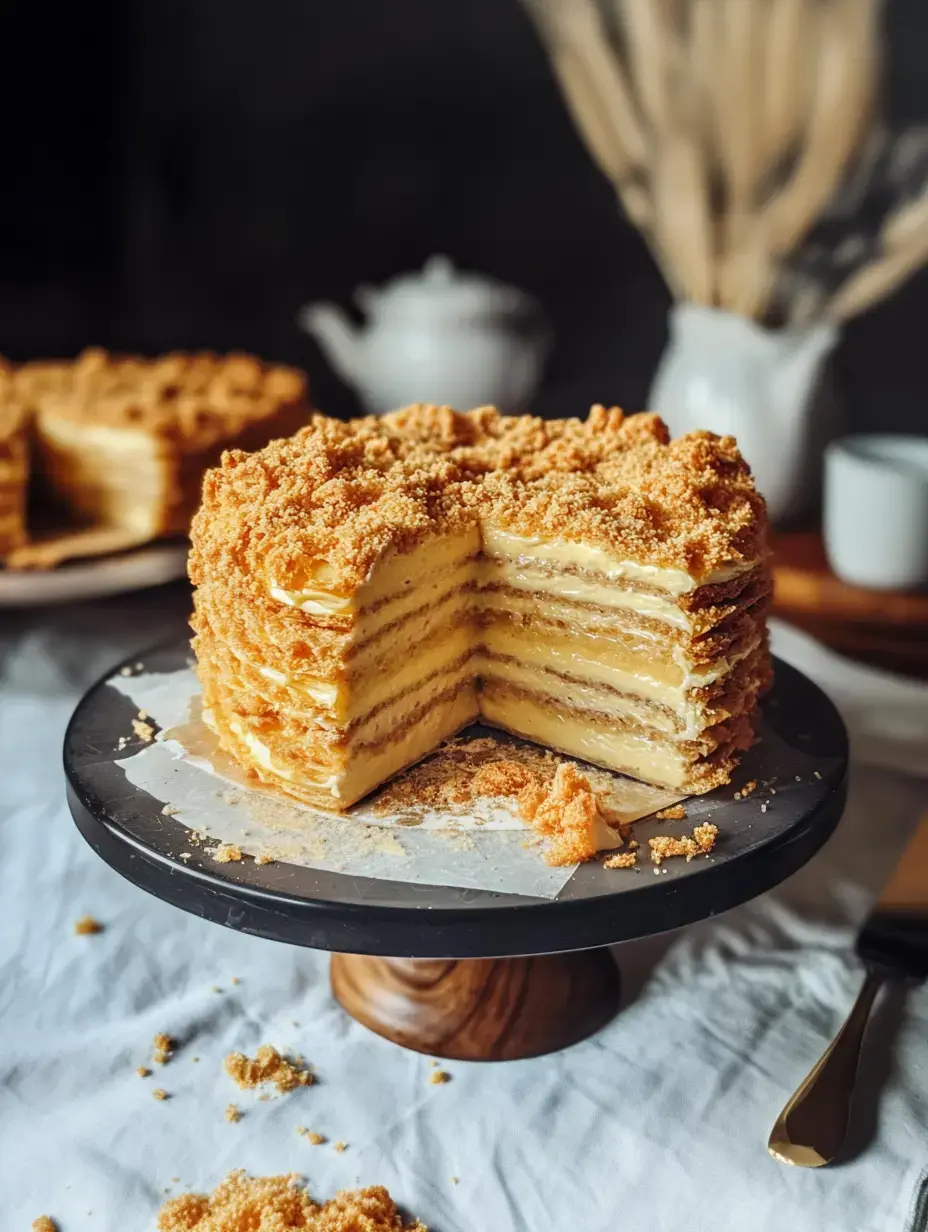
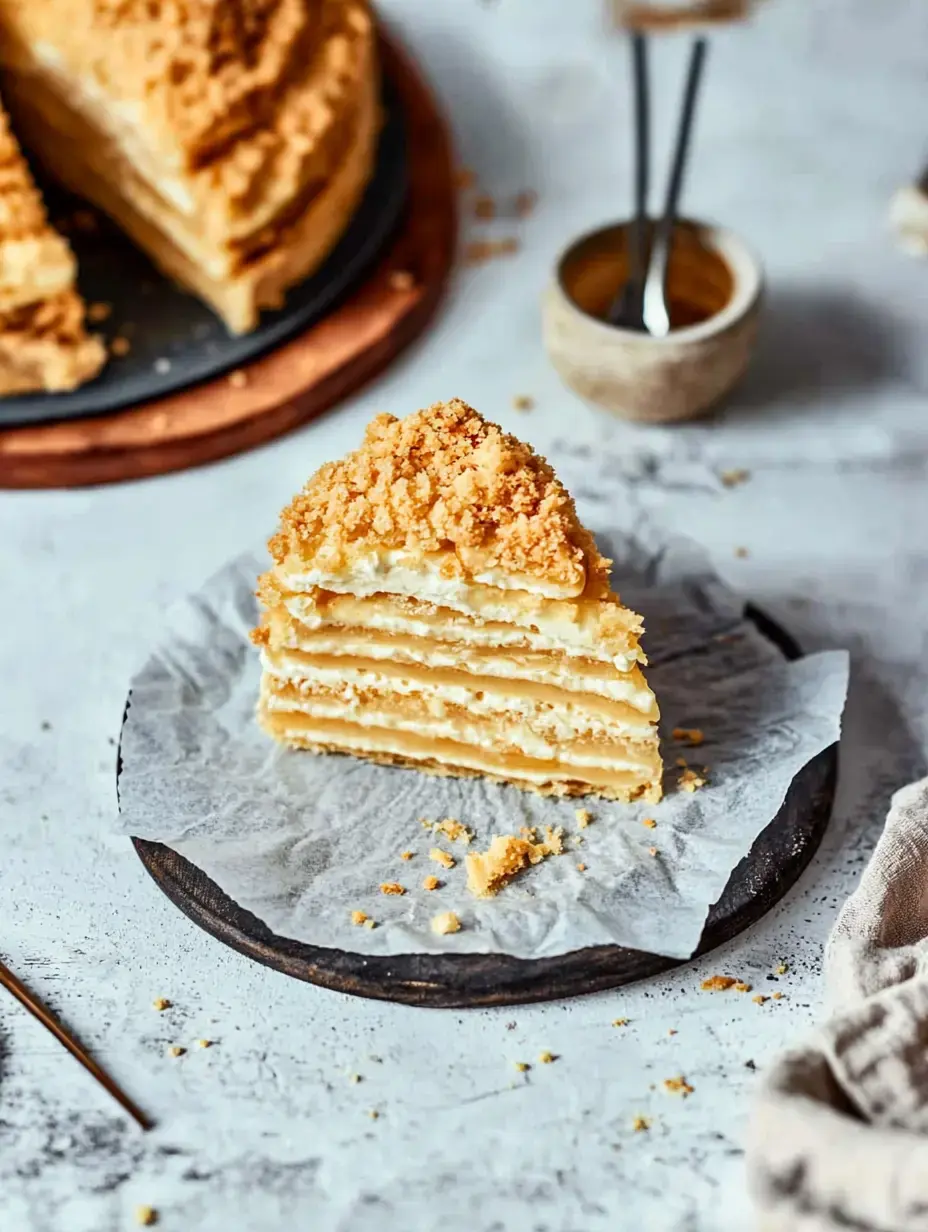
Crumb Technique
Create a polished finish by applying finely ground crumbs to the exterior, adding professional refinement and textural contrast.
Pastry Handling
Utilize parchment paper when rolling and transferring dough layers to maintain shape and prevent tearing.
 Save
Save
Fruit Enhancement
Spread a thin layer of quality fruit preserves between pastry layers to introduce bright flavor notes.
Decorative Finish
Reserve pastry scraps to create intricate designs for the top, adding visual interest to the final presentation.
Ingredient Preparation
Ensure all ingredients reach room temperature before beginning. This promotes smooth dough formation and proper cream consistency.
Serving Guidelines
Let cake stand at room temperature briefly before serving to maximize flavor development and achieve ideal texture.
Storage Methods
Store completed cake in refrigerator for up to three days, or freeze for one month. Thaw overnight in refrigerator before serving.
 Save
Save
Recipe FAQs
- → Can this cake be prepped in advance?
- Sure! You can chill the pastry dough for several days, and the finished cake should chill for at least 3 hours to set.
- → Why is it important to chill the dough?
- Cold dough makes the butter firm up, giving you flakier layers in the end. It’s also much simpler to handle.
- → What does tempering eggs mean?
- It’s when you slowly mix hot milk into the eggs to stop them from turning into scrambled pieces, so the cream stays smooth and silky.
- → How long will this dessert last?
- It’s best kept in the fridge for up to 3 days. Over time, the layers will soften nicely.
- → Can this cake be frozen?
- Freezing isn’t ideal since it can mess up the texture of the pastry and cream.
Flaky Layer Cake
An iconic treat from Russia with delicate layers of crispy pastry and creamy vanilla filling.
Ingredients
Steps
Toss flour, salt, and butter into a food processor and blend until it looks like crumbs. Add in the eggs, icy water, vinegar, and vanilla paste, and mix until everything just comes together.
Split the dough into eight parts, press into flat discs, wrap them up, and refrigerate for about 2-3 hours.
Roll each disc into a thin circle. Trim it down to an 8-inch size, poke a fork over it, and bake at 375°F for 10-12 minutes.
Take egg yolks, sugar, flour, and a bit of the milk and whisk them well. Heat the rest of the milk, then slowly pour it into the egg mixture to warm it up. Cook until the consistency thickens.
Mix in the butter and vanilla once warmed milk is thickened. Give it time to cool completely.
Stack the baked circles with layers of cream between them. Smother the top and sides with more cream and sprinkle crushed crumb bits over everything.
Chill your cake in the fridge for at least three hours or even overnight for everything to soak and settle.
Notes
- You can prep the dough ahead and chill it.
- Leftover pastry scraps are great for crumb topping.
- Don’t rush—it needs time in the fridge to let the layers soften evenly.
Required Tools
- A food processor.
- Rolling pin.
- A mold or template for an 8-inch circle.
- Baking trays.
- A cooking pot.
Allergy Information
Check each ingredient for potential allergens and consult a healthcare professional if needed.
- Eggs.
- Dairy (milk, butter).
- Wheat (flour).
Nutritional Facts (per serving)
These details are provided for informational purposes and aren't a substitute for medical advice.
- Calories: 776
- Fats: 49 g
- Carbohydrates: 70 g
- Proteins: 14 g