
 Save
Save
My kids and I whipped up these Easter Bunny Cinnamon Rolls last Easter morning, and they were such a hit that my little girl's already asking if we can make them again! They're super easy but look like you spent forever making something fancy - just what you want on a holiday morning when you need something fun without all the work.
When I sent my mother-in-law a picture, she thought I'd actually made them from scratch - that's how good they look even though they only take a few minutes to put together!
Stuff You'll Need
- Canned cinnamon rolls: Go for the big or Grands! size for better shaping. I've tried both Pillsbury and cheaper brands and they all work great.
- Easter sprinkles: Those soft-colored sprinkles really add that holiday feel. Regular rainbow ones work fine too if that's all you've got.
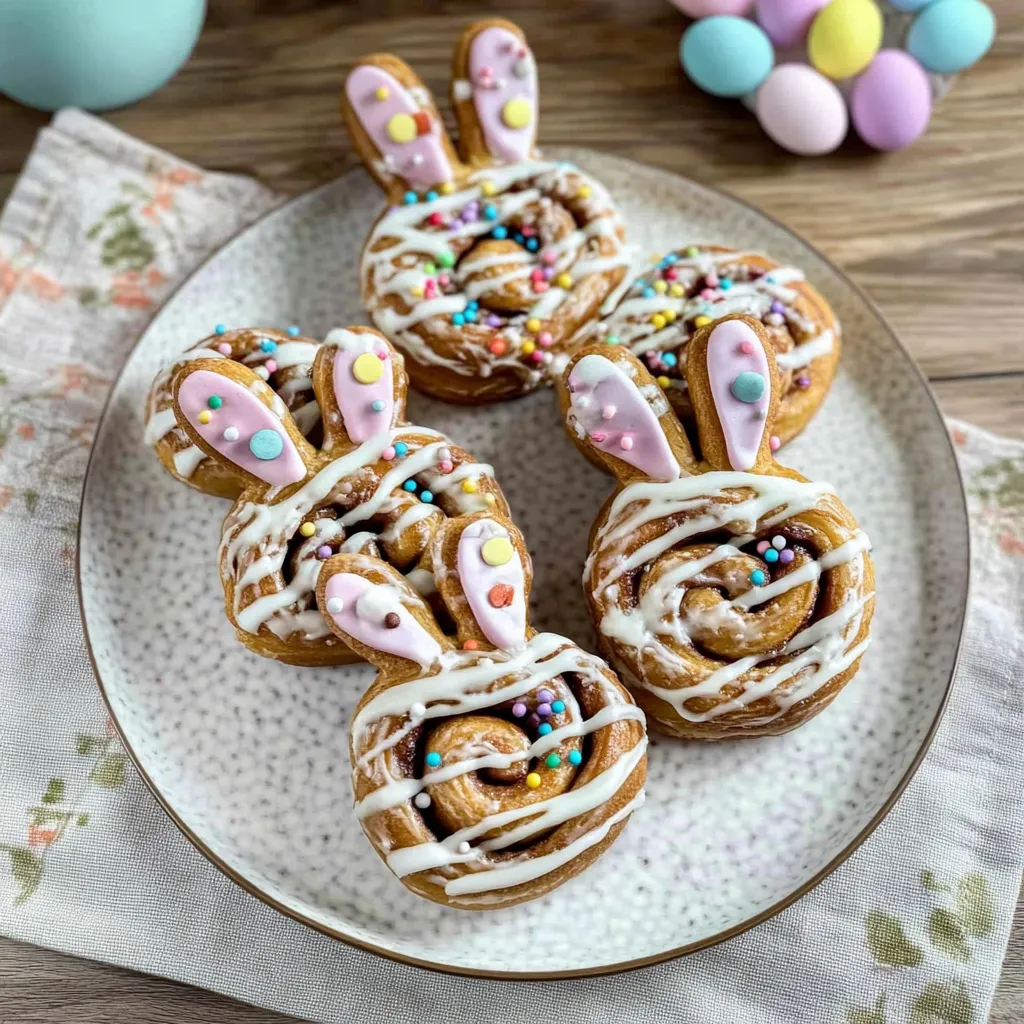
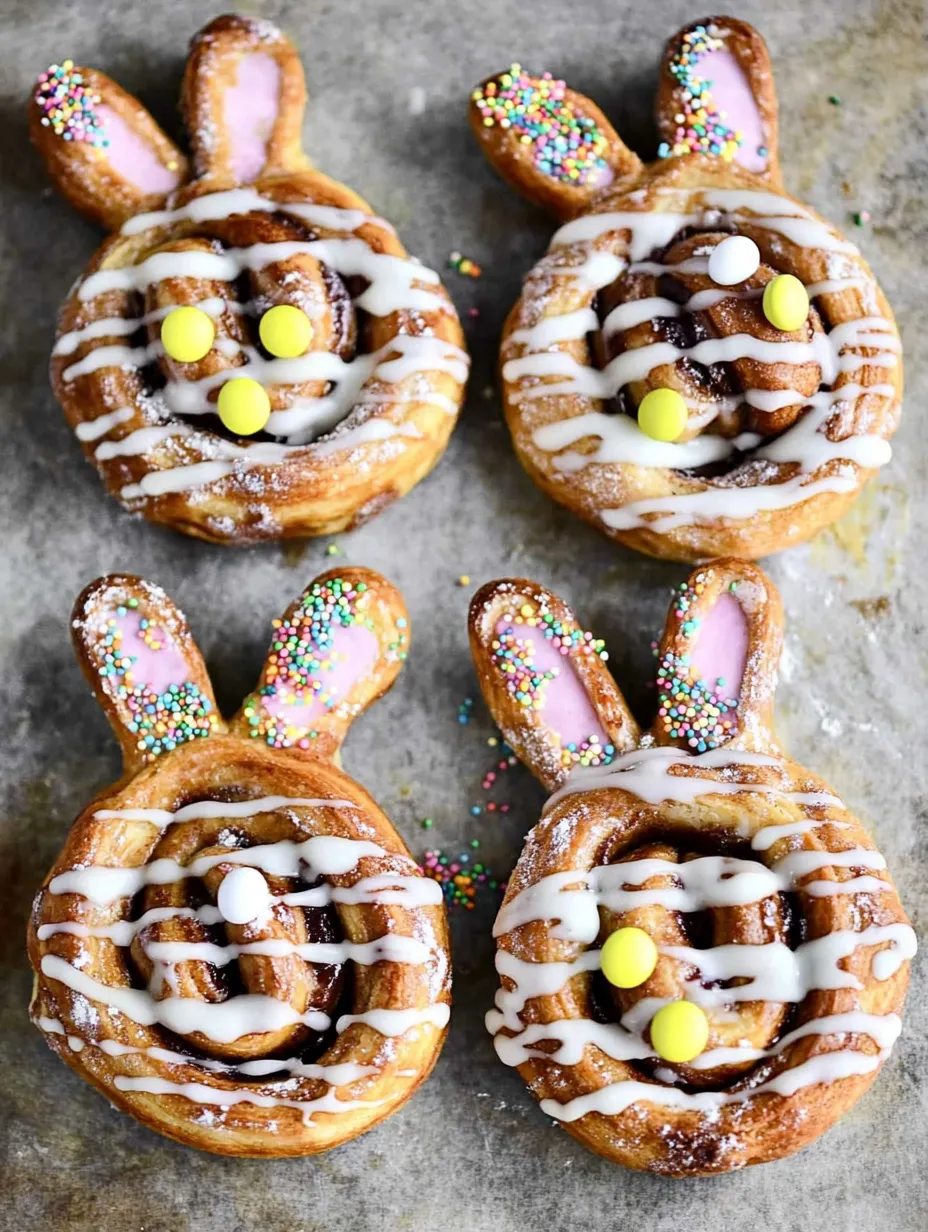
- Candy for decorating: M&Ms or similar round candies make awesome bunny eyes and noses. I grab pink, blue, or yellow ones to match Easter colors.
- Parchment paper: Saves you from scrubbing pans and stops everything from sticking.
 Save
Save
How I Put Them Together
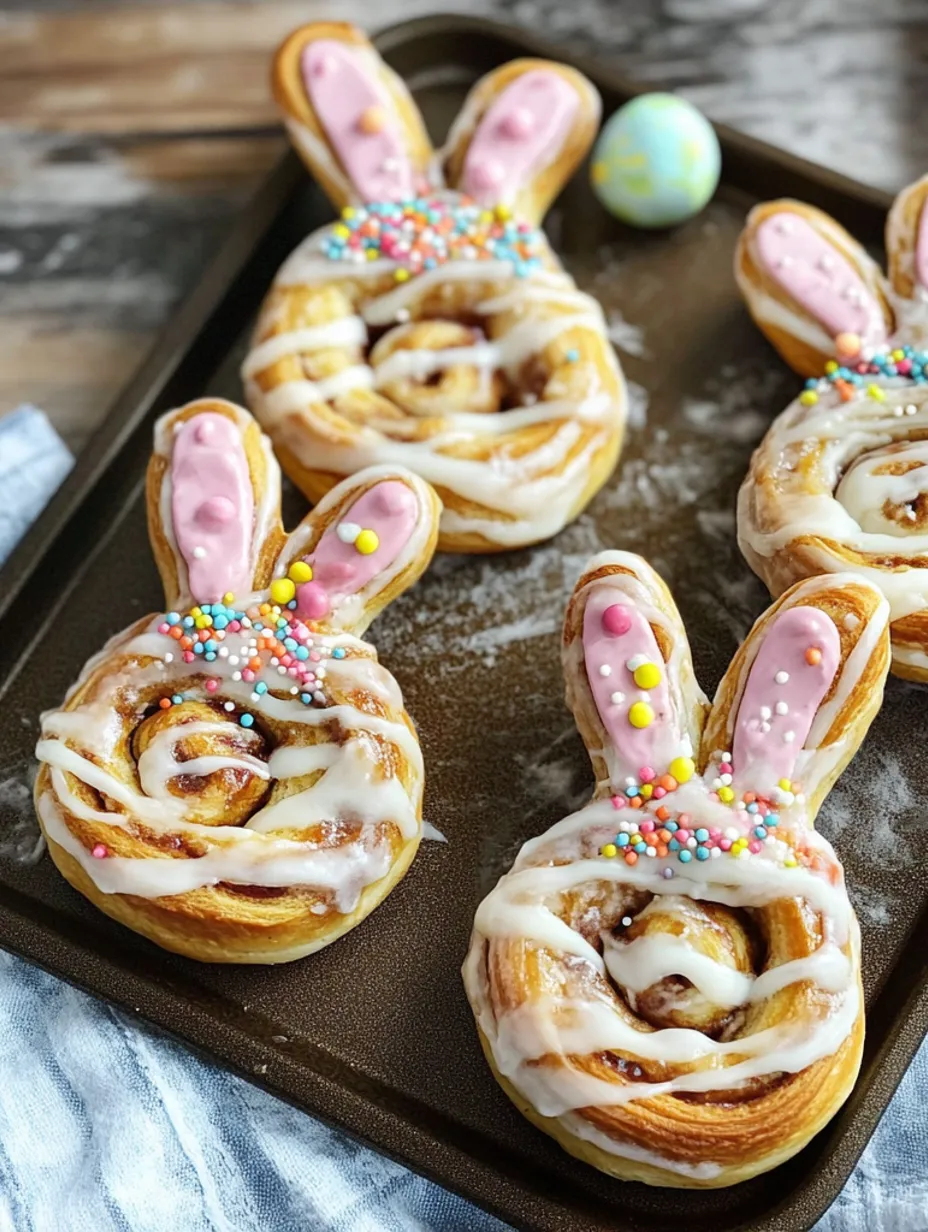
Basic FormingThe cool part is how you shape them, and it's actually really easy! I just take the outside end of each roll and pull it up and out to create ears, then push between them to make that cute bunny shape. The dough doesn't mind being played with, so you can fix it if needed.
Halfway ReshapingThe smart trick that makes these work is taking them out midway through baking to fix the shape. As they puff up, the ears can start to blend in, but a quick touch-up with a wooden spoon handle keeps them looking like bunnies.
Fast DecoratingThe secret to decorating is adding sprinkles right after you put on the icing while it's still gooey. This makes sure they stick well and don't fall off. The candy eyes and nose also need to go on right away.
Smart TimingI've learned to get all my decorating stuff ready before the rolls come out of the oven. This makes everything go smoother, since you gotta work fast while the icing is still sticky.
I found this idea a couple years back during our lockdown Easter when I wanted easy ways to make the day special without seeing our whole family. Now the kids can't wait to make them every year!
Ways To Serve Them
These bunnies look super cute as the main attraction on your Easter breakfast table. I usually put them on a big plate with strawberries and blueberries for color. To make a complete Easter breakfast, add some fluffy eggs and crispy bacon. You could even build a whole bunny-themed breakfast platter with these as the main stars!
Switch Things Up
Play around with different candies for faces - tiny chocolate chips work great for eyes too. Mix some pink food coloring into part of the icing for pink ears. Want chocolate bunnies? Start with chocolate chip cinnamon rolls instead. Feeling fancy? Skip the canned stuff and use your own homemade dough.
Helpful Hints
These taste best right out of the oven while they're still warm. If you need a head start, you can form the rolls the night before, cover them with plastic wrap in the fridge, then bake them in the morning. Just cook them a minute or two longer if they're cold from the fridge.
 Save
Save
Expert Advice
- Cover your baking sheet with parchment for less mess and no sticking
- Leave plenty of room between bunnies since they grow quite a lot
- Keep a bit of icing aside to draw whiskers using a toothpick after finishing
These Easter Bunny Cinnamon Rolls have turned into a can't-miss part of our holiday fun. There's nothing better than watching my kids' faces light up when they see those cute bunnies lined up ready to bake. It's those simple moments - working together on shaping the dough, picking which M&M colors to use for eyes, and then sitting down to enjoy them together - that build those holiday memories we'll always remember.
Recipe FAQs
- → Can I shape homemade dough like bunnies?
- Yes, your own dough works fine as long as it's soft enough. Shape it into bunnies right before letting it rise the final time.
- → Why do the bunnies need to be reshaped mid-baking?
- The dough will expand in the oven, which can mess up the ear shape. Adjusting halfway keeps them looking like bunnies.
- → What if I don't have M&Ms for eyes?
- Swap them out for mini chocolate chips, raisins, jelly beans, or anything small and colorful.
- → Can I bake these in advance?
- They taste best fresh and warm. If you prep early, reheat quickly in the microwave to bring back some softness.
- → How can I tell they're done baking?
- They're ready when golden brown on top. Check the middle to ensure the dough isn't raw.
Cute bunny rolls
Shape pre-made cinnamon rolls into bunnies with ears, then decorate with candy for the eyes and nose. A fun idea for a holiday breakfast!
Ingredients
→ Base Ingredients
→ Decoration
Steps
Set your oven to the temperature mentioned on the cinnamon roll packaging (typically 350°F) or follow the instructions for your homemade rolls.
Spread out the cinnamon rolls on your counter. Gently stretch the ends of one cinnamon roll upward to form one ear, then repeat on the other side. Press between the ears and along the edges to make sure they stay in place.
Move the bunny-shaped rolls onto a baking tray lined with parchment paper, leaving space around them to grow bigger while baking.
Put the tray with your cinnamon rolls into the warmed-up oven and bake following the time and temperature on the package.
Midway during baking, take the tray out of the oven. Carefully press the ear shapes back into place using a wooden spoon handle if they've puffed up too much.
Pop the tray back into the oven and bake until the rolls turn lightly golden and are fully done.
While the rolls are warm, pour the icing on top. Quickly add sprinkles before it dries so they stick, then press on two M&M's for eyes and one for a nose on each bunny face.
Enjoy the bunny rolls fresh while they're still warm and soft.
Notes
- Jumbo or Grands! cinnamon rolls are ideal as they're easier to shape into bunnies.
- If you're making the dough at home, form the bunny shapes prior to the final resting stage.
- Add sprinkles fast while the icing is tacky to make sure they stick well.
Required Tools
- Tray for baking
- Optional: parchment paper to prevent sticking
- Wooden spoon for reshaping the bunny ears
Allergy Information
Check each ingredient for potential allergens and consult a healthcare professional if needed.
- Cinnamon rolls have wheat/gluten
- Icing and M&M's contain dairy
- Sprinkles might include nuts, depending on the brand
Nutritional Facts (per serving)
These details are provided for informational purposes and aren't a substitute for medical advice.
- Calories: 320
- Fats: 12 g
- Carbohydrates: 48 g
- Proteins: 4 g