
 Save
Save
I found this M&M cookie pizza idea while scrambling for a quick but fun treat for my boy's birthday last year. There's something magical about combining a soft, gooey cookie base with melted chocolate and colorful candies. It looks fancy but only takes half an hour to throw together. Now we make it whenever we want something sweet that feels a bit special without much fuss.
My kid's buddy dropped by while this was cooling and her jaw dropped when she spotted all the bright M&Ms. She took one bite and immediately grabbed her phone to snap a pic for her mom. It's funny how the easiest treats often get the biggest reactions, especially from youngsters.
Basic Ingredients
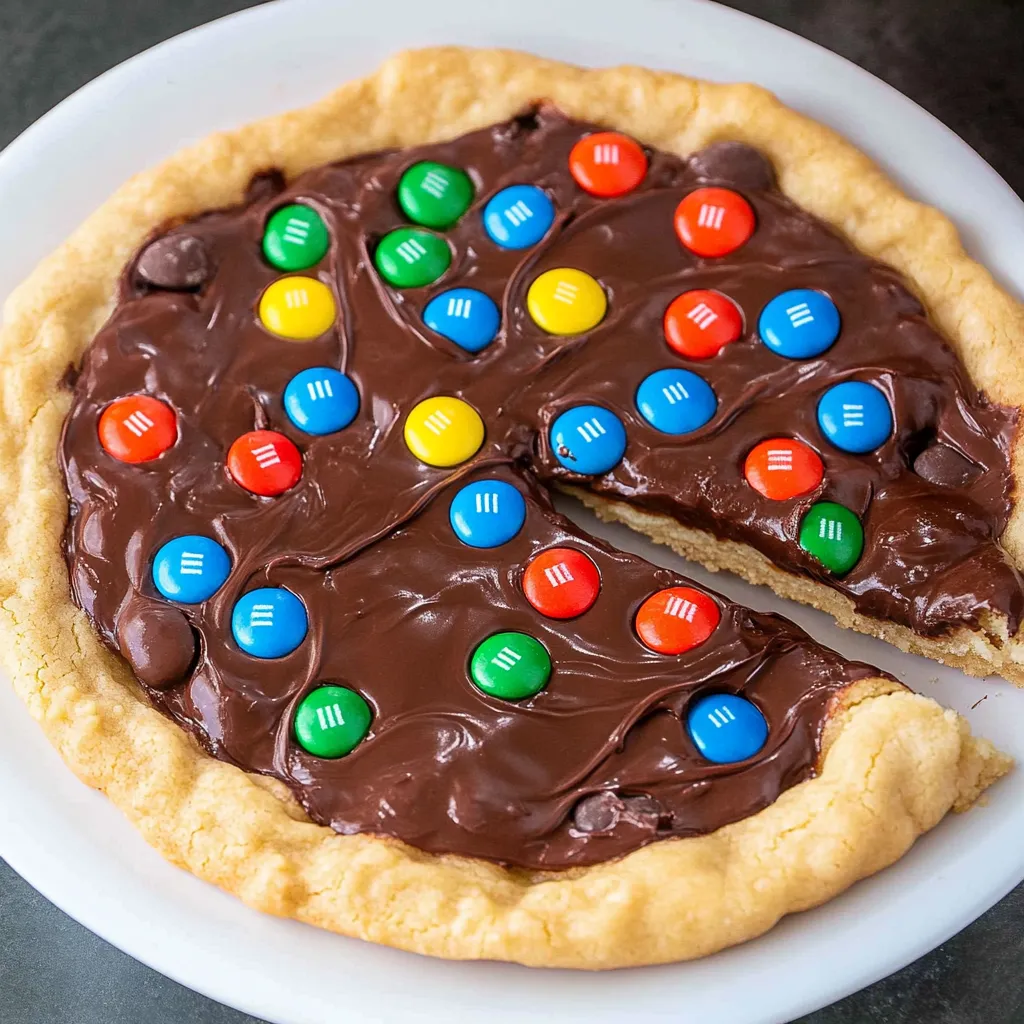
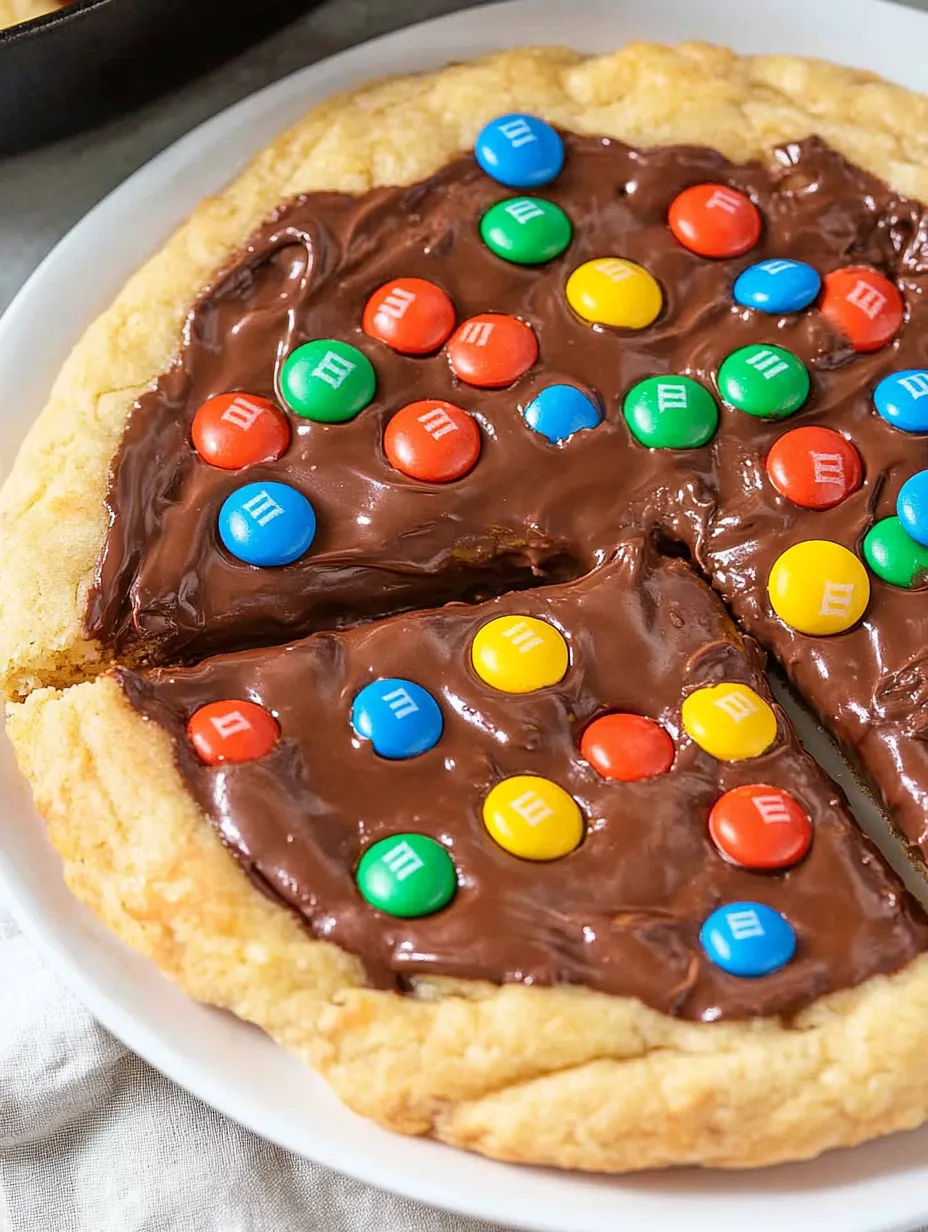
- M&M candies: The hard shells bring bright colors and nice crunch against the soft cookie base
- Melted butter: Gives deeper flavor than just using softened butter in this quick cookie mix
- Brown sugar: Brings that wonderful chewiness and hints of caramel taste
- Milk chocolate chips: They turn into a smooth layer that helps extra M&Ms stick on top
- Cast iron skillet: Not food but you'll need it for those crispy, perfect edges
 Save
Save
Tasty Cookie Pizza Steps
- Getting Your Skillet Ready
- Don't skip putting parchment in your skillet even though it seems like extra work. It's a lifesaver when you want to lift out the whole cookie later. I draw around the skillet bottom on parchment paper, cut that circle out, and push it into place. My first try, I skipped this step and had to dig out pieces one by one. Now I make sure the paper sticks up a bit on the sides as handles. If your skillet's really well-seasoned, you might get away with just greasing it, but parchment never fails.
- How To Mix It Up
- We're using melted butter here instead of creaming it, which makes the cookie denser and chewier - exactly what we want. Let your melted butter cool down a bit before you mix it with sugar or you might cook the egg too early. I don't bother with a mixer - a wooden spoon works great, and too much mixing can make your cookie tough. When you add your dry stuff, just mix until you can't see flour anymore for the softest result.
- Candy Placement Strategy
- Split your M&Ms between the dough and topping so you get color inside and a pretty top. Be gentle when you fold them into the dough so you don't crack the shells and smear color everywhere. Sometimes I save certain colors to make patterns on top - great for team parties or holidays. Seasonal colored M&Ms can make it match any holiday without extra work.
- Careful Baking
- Keep an eye on this cookie while it bakes - timing changes based on your oven and pan. Look for golden edges while the middle still seems a bit soft. It'll keep cooking after you take it out. I start checking at 13 minutes, though 15 usually works in my oven. Remember, cast iron stays hot, so your cookie will keep cooking even after it's out.
- Chocolate Topping Tricks
- Melt your chocolate in short bursts to avoid burning it. Start with 30 seconds, then do 15-second bursts with stirring between. Milk chocolate tastes best here - dark can overpower everything, and white is way too sweet. Spread the chocolate while the cookie's still a bit warm for the smoothest layer, but waiting those 10 minutes makes sure your cookie won't fall apart as you spread.
- Putting It All Together
- Push the rest of your M&Ms into the melted chocolate while it's still soft so they'll stick properly. I try to work fast and spread the colors evenly across the top. Don't skip that 15-20 minute rest afterward - it lets your cookie finish cooling and the chocolate firm up, which means cleaner slices. If you're in a rush, stick it in the fridge for 5-10 minutes to speed things up.
My guy normally turns down desserts, but he grabbed a second piece of this cookie pizza without me saying a word. There's just something about that nostalgic cookie taste mixed with candy that pulls everyone in, no matter how old they are.
Delicious Companions
This bright treat tastes amazing with a scoop of vanilla ice cream on the side. For birthday parties, we add ice cream and stick a candle in each slice. On movie nights, we enjoy smaller pieces with cold milk for that classic cookie experience. My children love having it after school with some apple slices to balance out the sweetness.
Fun Twists to Try
Switch up the toppings with chopped Reese's cups or Snickers for totally different flavors. You can also use white chocolate chips instead of milk chocolate and grab holiday M&Ms for special occasions. Toss a spoonful of sprinkles into the dough for a confetti-style base. Last summer I threw some mini marshmallows on top during the final minutes of baking, making a s'mores version that vanished even quicker than the original.
 Save
Save
From classroom parties to family movie nights, this M&M cookie pizza always brings big smiles. There's something special about the mix of chewy cookie, smooth chocolate, and bright candy that both kids and grown-ups love. My little girl now wants this instead of cake for her birthday, which I think is the biggest compliment any dessert can get. It's funny how the easiest recipes often become the most treasured family favorites, creating kitchen memories that last way longer than the treat itself.
Recipe FAQs
- → Can I use a different skillet size for this dessert?
- Of course! To fit a 10-inch skillet, boost ingredients by 1.5 times. Double everything if using a 12-inch. Keep an eye on the oven—thinner cookies bake faster, thicker ones take longer.
- → Can I swap the M&Ms for other chocolate?
- Go for it! Reese’s Pieces, chopped peanut butter cups, or chocolate chunks work perfectly. Feel free to toss in nuts or dried fruits for something different.
- → How do I tell when this cookie is baked just right?
- Look for edges that are lightly browned and a middle that’s set but still a little soft. Don’t let it overbake—it’ll firm up as it cools. For gooier results, shave a few minutes off the baking time.
- → Can I prep this cookie and bake it later?
- Absolutely! Make the dough up to a day ahead, refrigerate it, and let it warm up slightly (around 15 minutes) before pressing it into the skillet. Once baked, you can store it at room temp for a day.
- → Do I have to use parchment paper in the skillet?
- While parchment makes it easier to lift out, it’s not a must. A well-seasoned skillet works great—just grease it thoroughly with butter or spray so nothing sticks.