
 Save
Save
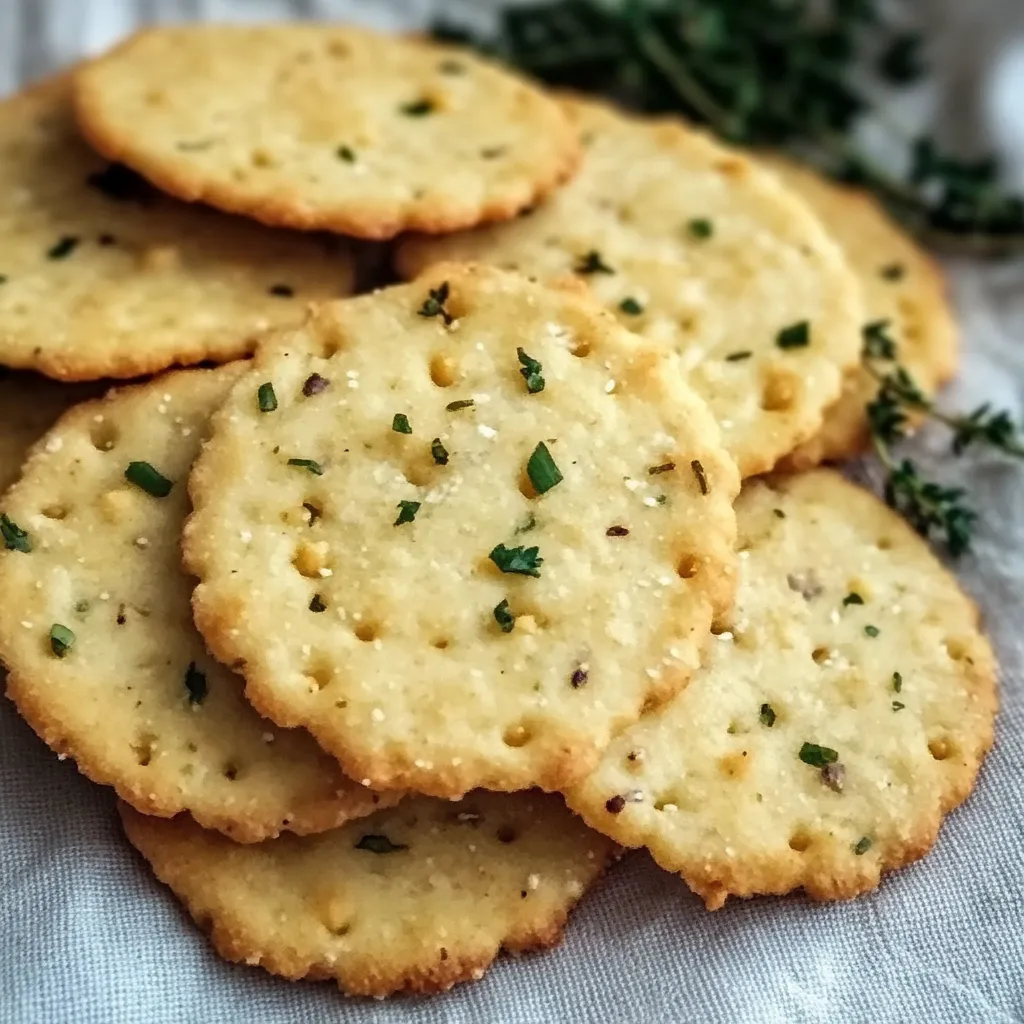
I found this chickpea flour garlic herb cracker idea when hunting for better snack choices last spring, bored with store options. The nutty flour mixed with savory herbs makes these amazing crunchy treats that seem fancy but cost way less than anything you'd buy. They've become what I grab whenever I need something with a nice crunch that won't make me feel guilty.
My neighbor dropped in while these were cooling, and she couldn't resist the smell of herbs and garlic filling my kitchen. She ended up eating three and begged for the instructions, amazed that such basic stuff could turn out tastier than anything from the store. It's funny how the easiest recipes can turn ordinary ingredients into something really special.
Basic Components
- Chickpea flour: Known as besan too, it gives a nutty taste and loads of protein
- Dried herbs: Mixing oregano, thyme, and rosemary creates that classic taste we all love
- Garlic powder: Brings wonderful flavor depth without burning like fresh garlic might
- Olive oil: Adds a nice richness and helps make those edges super crispy
- Salt and pepper: Ties all the flavors together perfectly
 Save
Save
Cracker Making Process
- Making Good Dough
- Your dough texture really matters here. It should feel just like play-dough, easy to work with but not sticking to everything. I learned to add water bit by bit instead of all at once. My first try, I dumped all the water in right away and got a sticky mess that needed more flour, which messed up the taste. Now I start with just half the water and slowly add more until it feels just right.
- Smart Rolling
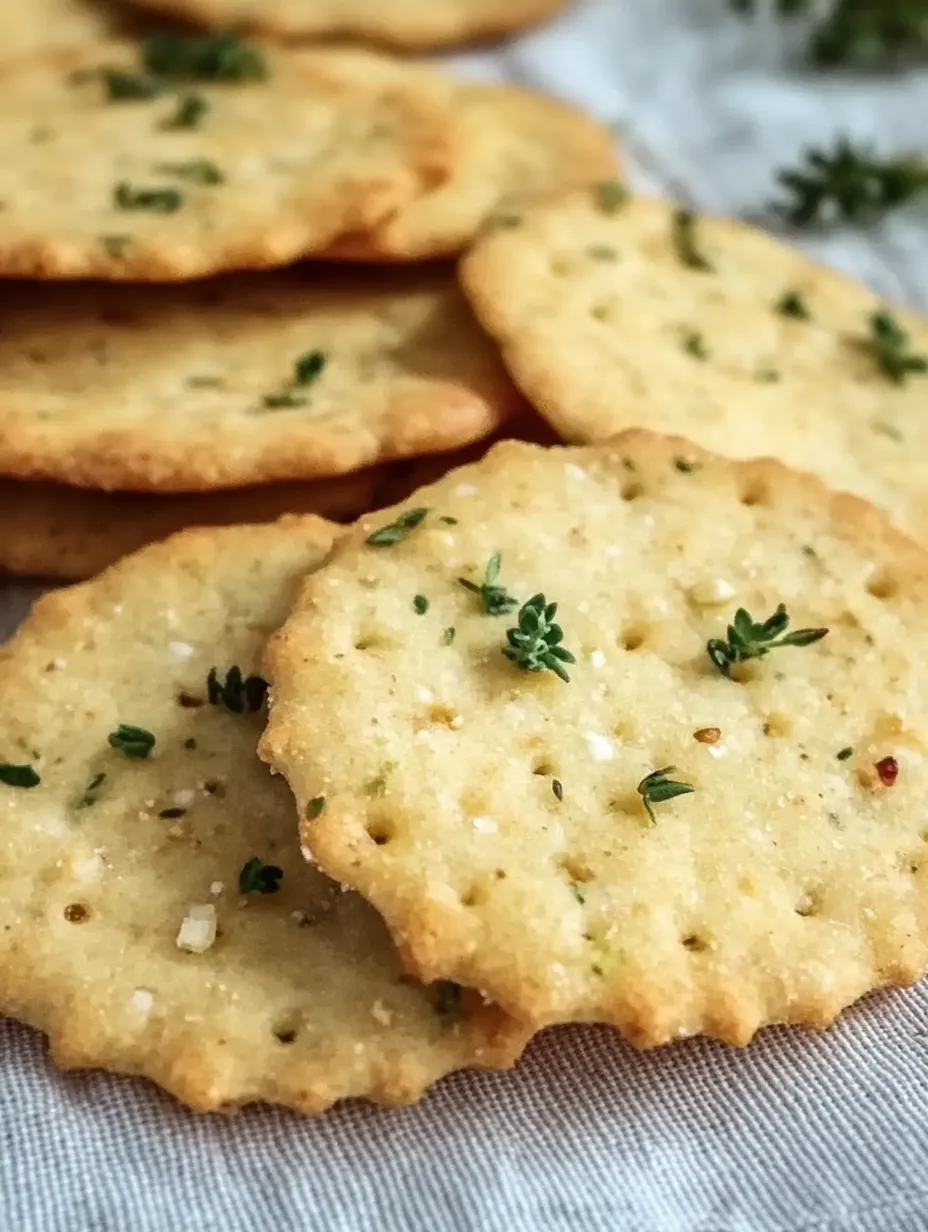
- Putting parchment paper below and on top of your dough is super smart. It keeps everything from sticking without needing extra flour that might dry out your crackers. Press down evenly when rolling to get the same thickness everywhere. I try for about 1/8 inch thick for the best crunch. My first batch had thin and thick spots, so some parts burned while others stayed soft. The parchment trick also makes moving the dough to your baking sheet so much easier.
- Cutting Tips
- Making good score lines before baking helps them break cleanly after cooling. A pizza cutter works great for this, making nice straight lines without pulling the dough. Don't worry about cutting all the way through, just make good marks. You can make any shape you want. I usually do small squares about 1.5 inches wide for snacking, but I've done everything from big rectangles to tiny diamonds when serving with cheese.
- Watching While Baking
- These crackers need your attention while they're in the oven. Chickpea flour has lots of protein, so they can go from perfect to burnt really fast. I start looking at them around 12 minutes and usually find they need about 15-17 minutes in my oven. The edges should be turning golden while the middle parts firm up. If some spots are getting darker faster than others, turn your pan around halfway through for more even baking.
- Waiting After Baking
- Letting them cool isn't just waiting time, it's actually part of the cooking. They get much crispier as they cool down. The first time I made them, I couldn't wait and tried them warm, and they were disappointingly chewy. When I let the next batch cool completely, they transformed into perfectly light, crispy crackers. Now I force myself to leave the kitchen while they cool so I'm not tempted!
- Keeping Them Fresh
- After they've cooled completely, put them in an airtight container to stay fresh. If they get a bit soft after a few days (though they rarely last that long at my house), quickly heating them in a low oven makes them crispy again. I've found glass containers keep them crunchy longer than plastic ones. When giving them as gifts, I put them in paper bags lined with parchment, which looks nice and keeps them protected.
My picky teenage son, who normally grabs bags of chips without thinking twice, actually asked me to make "those garlic crackers" again for his friends when they were studying. When a teenager picks homemade stuff over junk food, you know you've got something good.
Tasty Combinations
These crackers go great with hummus or baba ganoush for a protein-packed snack. When friends come over, I lay them out with soft cheeses like goat cheese or brie, which really go well with their nutty taste. They're sturdy enough to scoop up thick dips like spinach artichoke without breaking. My husband loves eating them with his lunchtime soup, while I often grab a handful with some fruit when I need a quick afternoon pick-me-up.
Taste Alternatives
You can add a teaspoon of smoked paprika for a light smoky taste. Or swap out the herb mix for za'atar or everything bagel seasoning for something different. Adding some finely grated parmesan to the dough makes a cheesy version that's really hard to stop eating. Last month I tried using finely chopped fresh rosemary instead of dried herbs, which made pretty green specks throughout and smelled amazing.
 Save
Save
I've made these garlic herb chickpea crackers so many times now, changing little things each round until they're just how I like them. What started as just a healthier option to store brands has become a kitchen staple and something friends always ask for. There's something really rewarding about turning a few simple things into something so yummy and good for you. My daughter even makes these in her college apartment now and says serving them to friends instead of boxed crackers makes her feel like she's got her life together.
Recipe FAQs
- → Does chickpea flour go by another name?
- Yep, it's also called besan or gram flour. It comes from ground chickpeas, has a nutty taste, and is naturally gluten-free—perfect for these crackers.
- → Can I switch up the spices or herbs?
- Totally! Go for Italian herbs with nutritional yeast for cheesy vibes, cumin and paprika for Southwestern flair, or mix in za’atar and sumac for a Middle Eastern touch.
- → Why aren’t my crackers crisp?
- Chewiness usually happens if they’re not baked enough or didn’t cool properly. Roll the dough thin (1/8 inch) and bake till the edges turn golden. Let them cool completely for that crunch.
- → How long can I store these crackers?
- Keep them in an airtight jar at room temp—they’ll be good for about a week. If they soften, put them in a 300°F oven for 5 minutes to crisp them up again.
- → Do these crackers work with dips?
- For sure! These sturdy crackers are great with hummus, guac, baba ganoush, or soft cheeses. Or just enjoy them plain as a tasty snack.