
 Save
Save
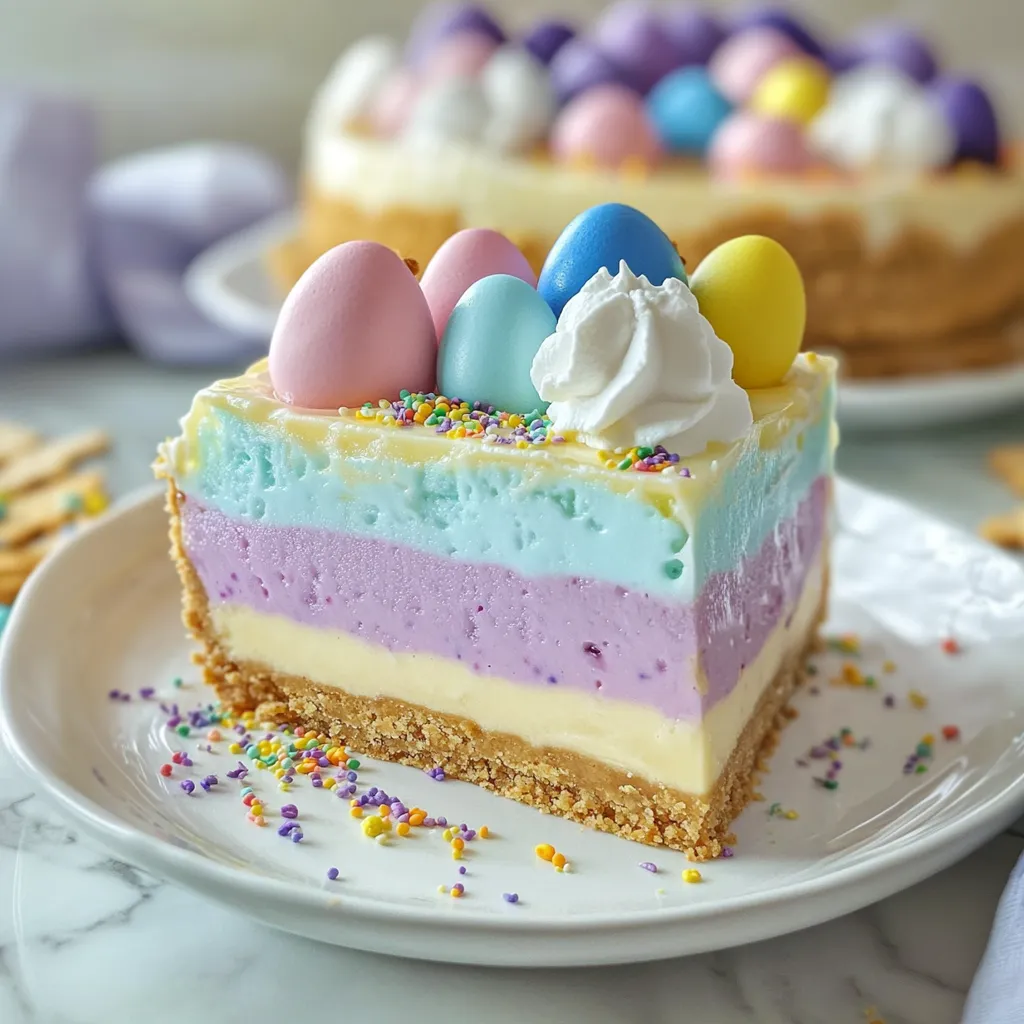
I came across this Easter Jell-O pie idea when I needed something colorful and fun for our family get-together last year. The smooth, pastel layers create an eye-catching dessert that looks like it took forever to make, but it's actually pretty easy. Now whenever Easter rolls around or we have spring gatherings, this is my favorite treat to bring when I want something that's both festive and reminds folks of simpler times.
When my niece spotted this pie at our Easter table last year, her eyes got huge with wonder. "It looks like magic!" she shouted before asking me to cut her the largest piece. There's just something about those bright, gem-colored layers that gets everyone excited, no matter their age.
Basic Components
- Flavored Jell-O: The trio of shades builds that stunning layered look
- Cream cheese: Brings a velvety thickness and changes the texture from bouncy to silky
- Whipped topping: Makes everything airy for a cloud-like feel
- Graham cracker crust: Gives you that needed crunch against the soft filling
- Fun add-ons: Sprinkles and candy eggs turn it into an obvious Easter treat
 Save
Save
Assembly Steps
- Color Arrangement
- Using the palest shade (lemon) as your base creates the best visual impact when you cut a slice. The yellow, blue, then purple sequence makes that gorgeous spring-like effect. I've tested other color combos, but this specific order works best for looks and taste. The lemon offers a zingy foundation that goes well with the sweeter berry flavors on top.
- Cooling Time Matters
- Those half-hour breaks between adding layers can't be skipped - they stop colors from mixing together. I found out the hard way that rushing makes for blurry layers instead of clean ones. I use my phone alarm so I don't forget the next step. Once I got sidetracked and left a layer cooling too long, which made spreading the next one tricky. Now I aim for just right - firm enough to hold up but not totally hardened.
- Handling The Cheese
- Your cream cheese must be fully room temp for easy mixing - cold cream cheese will give you chunky layers. I leave mine out at least an hour before I start. When blending with Jell-O, I grab a whisk and work fast so the mix doesn't start setting before it's smooth. The cream cheese adds richness and also helps the layers stay put when cutting. Splitting it into exact thirds keeps everything consistent throughout.
- Layer Addition
- When you put a new layer on top of a set one, pour super slowly, maybe over a spoon's back. This breaks the liquid's fall and keeps it from punching through your previous layer. I usually hold my spoon just above the surface and slowly add the mix onto it, letting it drift gently off the sides. Taking your time here makes all the difference between sharp, clean layers and a jumbled mess.
- Adding Toppings
- Put the whipped cream and decorations on just before you serve for the freshest look. If you need to work ahead, make the pie itself a day early, but save those final pretty touches until right before showing it off. I've noticed candy eggs sometimes leak their colors onto whipped cream if added too early. Sprinkles hold up better but still look best when added at the last minute.
- Cutting The Pie
- For the prettiest slices, wet your knife in hot water and dry it between cuts. This stops the layers from getting dragged around and keeps each piece looking perfect. I've found that thin knives work better than thick ones at keeping those beautiful layers intact. When serving, a pie server with a slim edge will get under the crust without breaking it.
My grandma, who usually sticks to old-school desserts, tried this pie and instantly said, "This tastes just like what my mom used to make for Easter!" It's funny how even the simplest treats can link us to family memories in ways we never expect.
Tasty Companions
Bring out this colorful dessert after a spring morning meal for a fun finish. At kids' parties, it steals the show as a centerpiece. During Easter dinner, it works as a lighter option than heavy traditional sweets. My family loves eating it with coffee, since the bitter coffee taste balances out the sweet, fruity pie flavors.
Mix It Up
Switch up the Jell-O flavors to create different color schemes - lime, orange, and strawberry make a sunny citrus version. Try a chocolate graham cracker base for a totally different taste foundation. For fancy serving, pour into clear cups or small mason jars to show off the layers. Last Easter, I threw in some fresh lemon zest to the yellow layer and a handful of blueberries to the blue layer, which added amazing pops of real fruit flavor.
 Save
Save
I've brought this Easter Jell-O pie to family dinners, church gatherings, and kids' birthday parties, and it always gets people smiling. There's something special about those bright, smooth layers that brings happiness to any spring celebration. My little girl has already asked if we can make this "rainbow pie" for her upcoming birthday party, even though Easter will be long gone. I've found that the recipes people remember most often combine basic ingredients with a bit of fun to create something that seems fancy but isn't actually hard to make.
Recipe FAQs
- → Can I swap out Jell-O flavors for new ones?
- Totally! Pick flavors you like best or mix them up for different colors. Stick to the 3 oz size and follow the same directions. Lime, strawberry, or orange are great ideas!
- → How early can I make this pie?
- You can prep it two days ahead. Keep it cool in the fridge, then add whipped cream and decorations just before it's ready to serve.
- → Why do my layers keep blending instead of stacking?
- Let each layer chill and slightly set (around 30 minutes) before adding the next one. Pour the next layer slowly over a spoon for a smooth stack.
- → Is cream cheese a must for this pie?
- Not really! Trade it for sour cream or Greek yogurt for a similar texture, or use whipped topping alone for a fluffier version.
- → Can I make this without gelatin for a vegetarian option?
- Yes, use plant-based swaps like agar-agar or a vegetarian gelatin mix (check their instructions). Also, make sure your crust is honey-free.