
 Save
Save
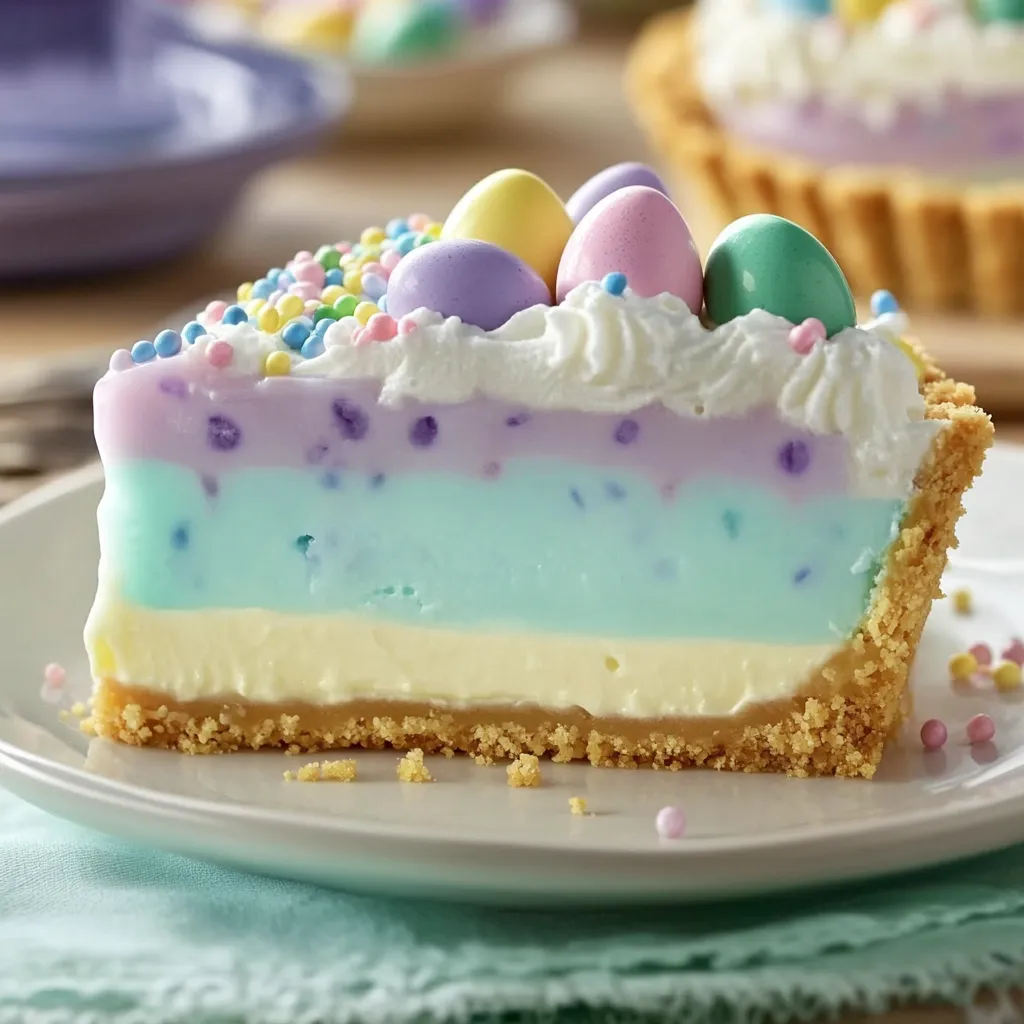
I found this Easter Jell-O pie creation by accident when I was looking for something bright and fun for our Easter family get-together last year. The smooth, soft-colored layers make such an eye-catching treat that looks like it took forever, but it's actually quite easy to put together. It's now my favorite dessert for Easter celebrations and spring get-togethers when I want something festive without putting in tons of work.
My little 8-year-old niece spotted this pie at our Easter table last year and her jaw dropped. "It's like rainbow magic!" she squealed before asking for the largest piece. There's just something about those bright, jewel-like layers that puts smiles on everyone's faces.
Ingredients List
- Three kinds of Jell-O: I pick lemon, berry blue, and grape to get those ideal Easter shades
- Cream cheese: This turns bouncy Jell-O into a velvety, mousse-type filling
- Whipped topping: Creates an airy, soft texture. Cool Whip does the job perfectly
- Graham cracker crust: Grab one from the store or whip up your own if you're feeling fancy
- Easter extras: Colorful sprinkles and candy eggs make it look totally festive
 Save
Save
My Preparation Method
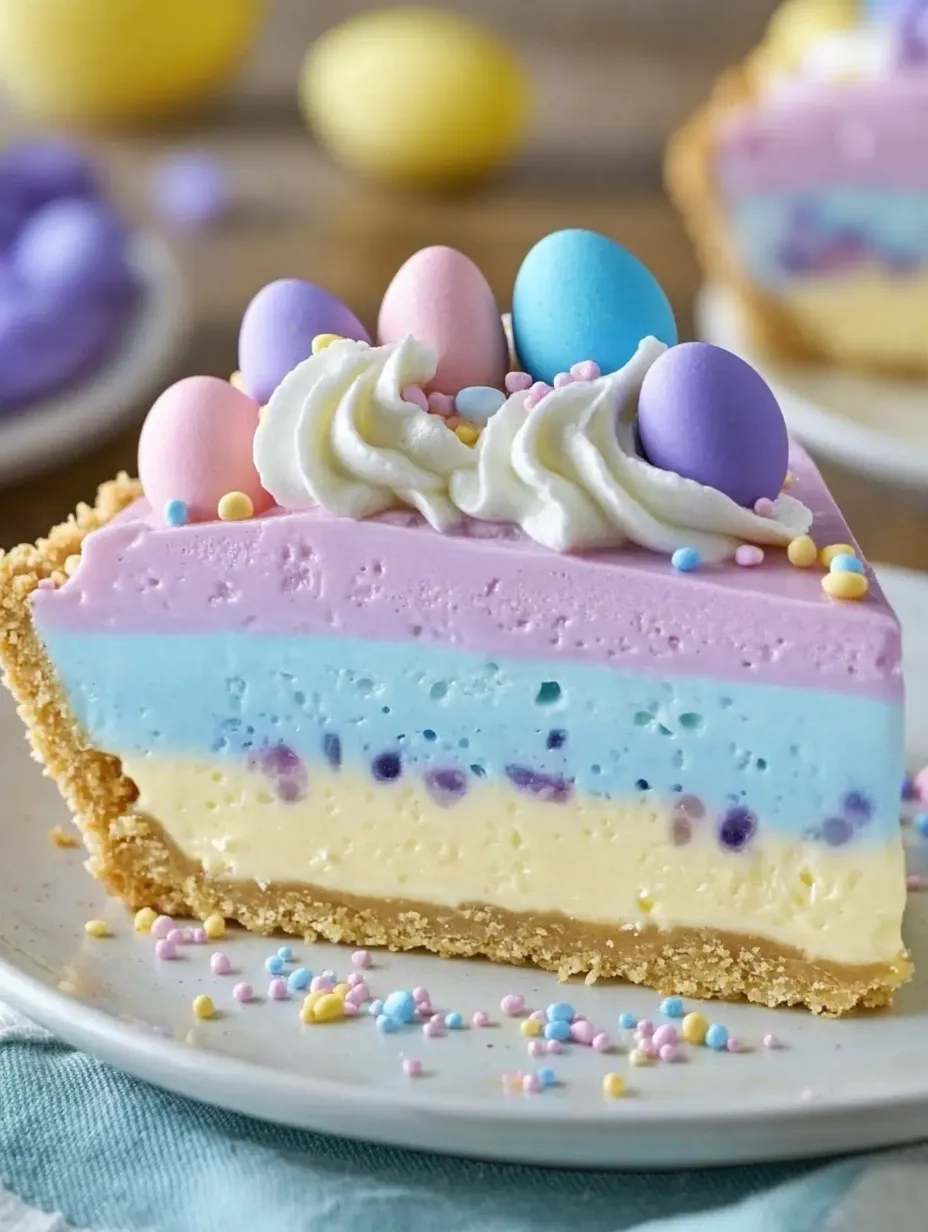
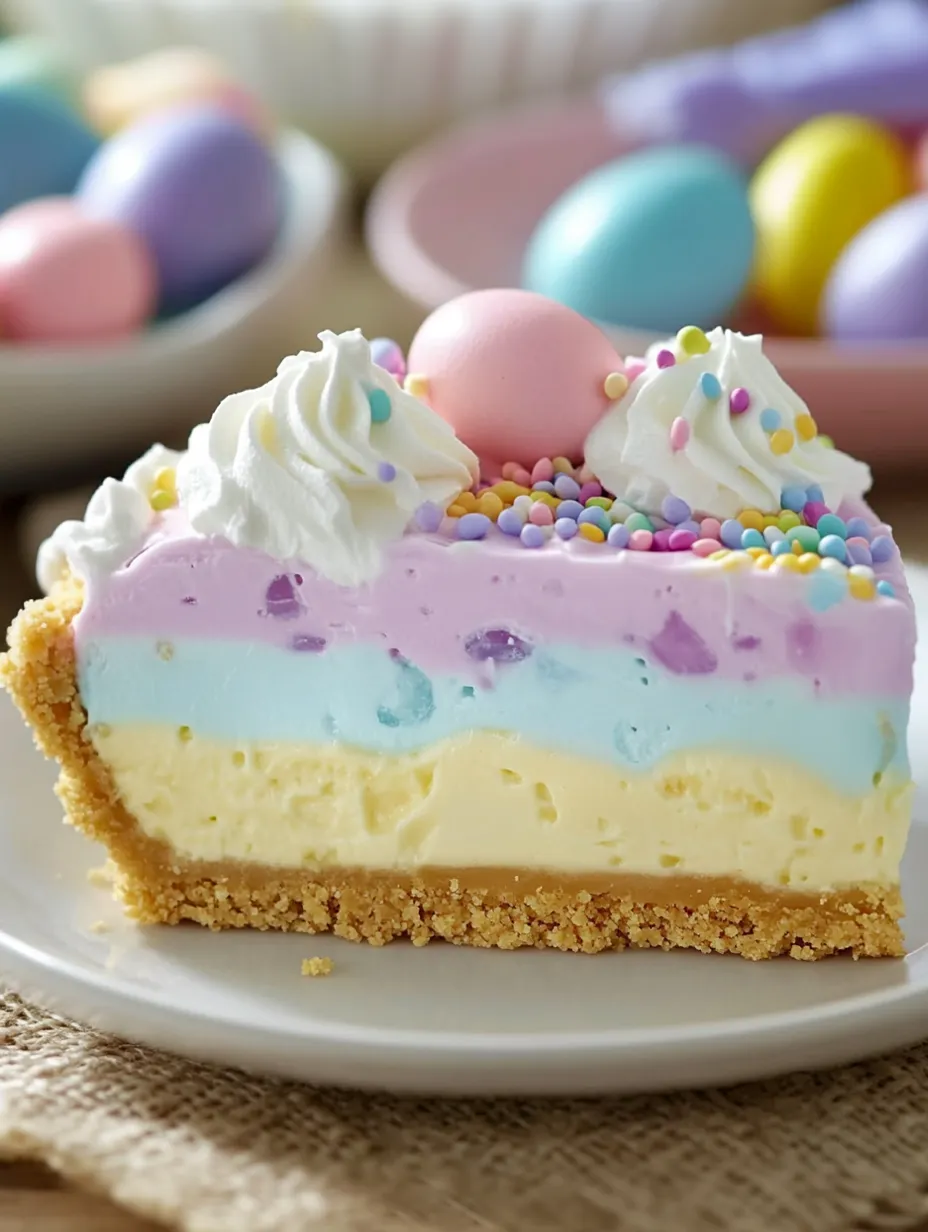
Color PlanningPutting the lightest shade (lemon) at the bottom makes the biggest impact when you cut a slice. I've played with different color combos, but yellow-blue-purple looks best and tastes great together. The lemony bottom gives a zingy, tart foundation that works well with the sweeter berry layers on top.
Waiting Game Between LayersYou can't skip those 30-minute cooling breaks between each layer - they stop the colors from running together. I always set an alarm so I don't forget. Once I got distracted during my first attempt and let a layer chill too long, which made spreading the next layer evenly a real challenge.
Cream Cheese TricksYour cream cheese must be completely softened for smooth mixing - cold cream cheese will leave you with bumps. I take mine out at least an hour ahead of time. The cream cheese doesn't just add richness, it also helps firm up the layers so they cut nicely.
Careful Pouring MethodWhen adding a fresh layer on top of a set one, I pour really slowly over a spoon's back. This breaks the liquid's fall and keeps it from punching through your previous layer. This simple trick is the difference between sharp, clear layers and a mixed-up mess.
My grandma, who normally sticks to old-school desserts, tried a bite of this pie and said, "This tastes just like what my mom used to make for Easter!" Sometimes the easiest treats connect us to memories in ways we don't expect.
Ways To Serve
This vibrant dessert fits perfectly after a spring morning meal. For kids' parties, it steals the show as a centerpiece. During Easter dinner, it offers a lighter choice than traditional heavy sweets. My family loves it with coffee, as the bitter coffee notes balance out the sweet fruit flavors.
Customization Options
Switch up Jell-O flavors for new color mixes - lime, orange, and strawberry create a sunny citrus version. Try a chocolate graham base for a different taste foundation. Create single portions in clear cups to showcase those pretty layers. At our last Easter, I mixed in some fresh lemon zest with the yellow layer and tucked a few blueberries into the blue layer for extra flavor pops.
 Save
Save
Early Preparation Ideas
This treat works great made a day early since it needs lots of cooling time anyway. Just add the fluffy topping and decorations right before you serve it. If you're taking it somewhere, pack the decorative bits separately and finish it when you arrive. The pie travels well in a cake box with a cold pack underneath.
Expert Advice
- Mix all three Jell-O packages at once to save time
- Wash your mixing bowl between colors so they don't mix
- For prettier slices, warm your knife in hot water and dry it between cuts
I've brought this Easter Jell-O pie to family dinners, church gatherings, and kids' parties, and it always gets smiles from everyone who sees it. There's something special about those colorful, creamy layers that brings happiness to any spring table. My little girl has already asked if we can make this "rainbow pie" for her birthday too, even though Easter will be long gone!
Recipe FAQs
- → Can I swap out Jell-O flavors?
- Of course! Choose your favorite colors or flavors to fit the Easter vibe. Sticking to the 3 oz boxes is ideal for the right consistency.
- → Why do I have to wait for layers to firm up?
- If you skip this, the layers might blend together. Letting them set gives you those lovely, clean lines.
- → How soon can I prep this dessert?
- It's perfect if made up to 48 hours in advance. Just cover it in the fridge and add decorations when you're ready to serve.
- → Can I use something else instead of a pie dish?
- Sure, go for a springform pan with graham crumbs on the bottom, or try layering in see-through cups for fun individual treats.
- → Why didn’t my Jell-O firm up?
- Check to ensure you measured water correctly and gave enough cooling time before mixing in cream cheese. At least 4 hours in the fridge is key for proper setting.
Easter Jell-O Layers
A sweet, creamy pie with three colorful Jell-O layers on a graham cracker base, finished off with whipped topping and festive candy decorations.
Ingredients
→ Crust
→ Jell-O Layers
→ Decoration
Steps
Grab a medium bowl and stir 1 cup boiling water into the lemon Jell-O for about 2 minutes or so until there are no grains left. Add 1 cup of cool water, stirring gently. Set it aside and let it rest until it's just warm to the touch, about 5 minutes.
In another bowl, beat about ⅓ of the softened cream cheese (roughly 2.5 oz) until smooth. Slowly pour in the cooled lemon Jell-O mixture while mixing. Once blended, fold in ½ cup whipped topping until it's fully combined with no streaks left.
Spread the lemon cream evenly into the graham crust base. Chill in the fridge for half an hour, or until it's just set enough to hold the next layer.
While the bottom layer sets, dissolve the berry blue Jell-O in 1 cup of boiling water. Stir in a cup of cold water and let it cool a bit. Whip up another ⅓ of the cream cheese until smooth and add in the blue Jell-O mixture. Mix well, and fold in ½ cup whipped topping at the end.
After the lemon layer has firmed up, carefully pour the blue Jell-O layer on top. To keep it from busting through the bottom layer, try pouring it slowly over the back of a spoon. Let it chill for another 30 minutes.
Make the grape Jell-O by mixing it with 1 cup of boiling water and then 1 cup of cold water. Let it rest a few minutes to cool. Beat the last portion of cream cheese until smooth, then mix in the grape Jell-O. Add the last ½ cup of whipped topping, folding it in gently.
Pour the grape mixture over the now-set blue Jell-O. Use the back of a spoon so it pours gently onto the layer beneath. Be super careful—this step works best when the mixture is cool to avoid melting.
Pop everything in the fridge for at least four hours or overnight. When it's completely firm, it's ready!
Right before serving, slap on some whipped cream, sprinkle pastels over it, and top with candy eggs for a fun, colorful vibe.
Heat up a sharp knife with hot water, pat it dry, and slice cleanly through the pie. Serve chilled for the best result.
Notes
- Take your time with each layer and make sure it’s slightly firm before adding the next to keep things neat.
- The cream cheese changes the Jell-O into a mousse-like texture, making it less wobbly and super smooth.
- Go lighter by swapping regular cream cheese and whipped topping for low-fat versions.
- Keep leftovers sealed in the fridge, and they'll stay good for up to 3 days.
Required Tools
- Three mixing bowls (medium-sized)
- Hand whisk or an electric mixer
- Measuring cups for accuracy
- Flexible rubber spatula
- Spoon to layer carefully
- A fridge with a flat shelf to chill
Allergy Information
Check each ingredient for potential allergens and consult a healthcare professional if needed.
- Includes dairy (cream cheese, whipped topping)
- Has wheat/gluten (graham cracker crust)
Nutritional Facts (per serving)
These details are provided for informational purposes and aren't a substitute for medical advice.
- Calories: 310
- Fats: 16 g
- Carbohydrates: 38 g
- Proteins: 4 g